AEM Adaptive Forms
AEM forms provides us a capability to create, update, publish and manage forms at run time. Using AEM forms we can add, update and delete any field in AEM Forms.
As part of this blog we are going to cover below topics:
- Why we need AEM Forms ?
- Setup AEM Forms in local AEM instance
- problem statement
- How Form works ?
- Schema
- Form creation and integration with Schema
- AEM form integration with servlet
Let’s try to understand why we need AEM forms on first place ?
Suppose we have a traditional form created using below HTML code placed inside form.html
<form action="/bin/submitform">
  <label>First name:</label><br>
  <input type="text" id="fname"><br>
  <label>Last name:</label><br>
  <input type="text" id="lname">
</form>
Issues with above HTML Form deployed on server as part of code:
- Any update related to field label, type or validation will require a code change and new build.
- Addition of new field or deletion of old field will also require a code change and new build.
- To update or add form submit action URL will also require a build.
- Addition of new form will also require a build.
- In short, making any change related to form will always require a build.
AEM Adaptive Forms provide us a capability to make all above mentioned changes at runtime without giving build.
Setup Adobe Forms in Local AEM Instance
- It will require Adaptive Form package installation from link. Search for forms in left side navigation.

Important Notes:
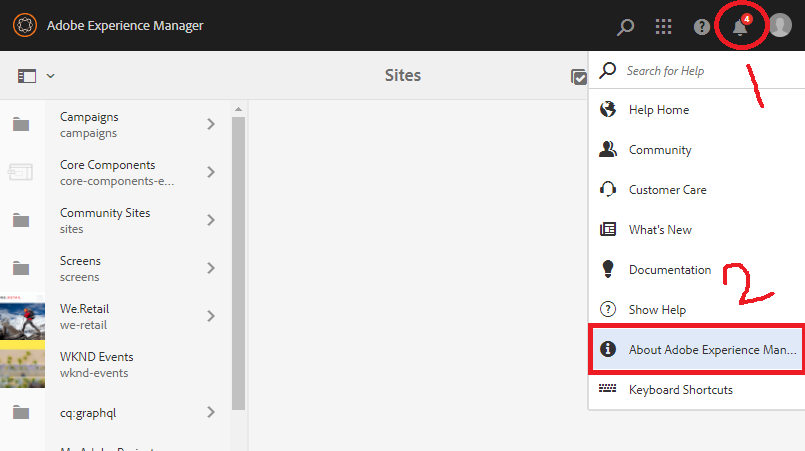
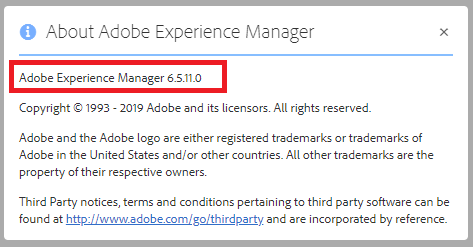
- Check you AEM local instance version and install same version of adaptive forms package. Follow below steps to check you local AEM instance version:
- Make sure to install required depending on operating system. It may happen where we can install Linux forms package package on windows operating system or vice versa.
- Please reach out to your lead or admin if you don’t have an access to above URL for downloading Adaptive Forms package.
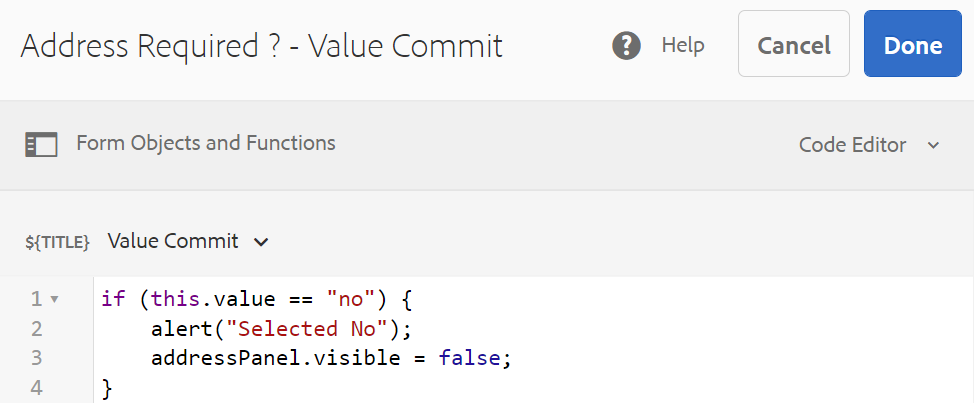
2. Accept EULA Terms and conditions and click on download for downloading this Forms package.

3. Go to package manager and upload above downloaded adobe-aemfd-win-pkg-6.0.566.zip package.
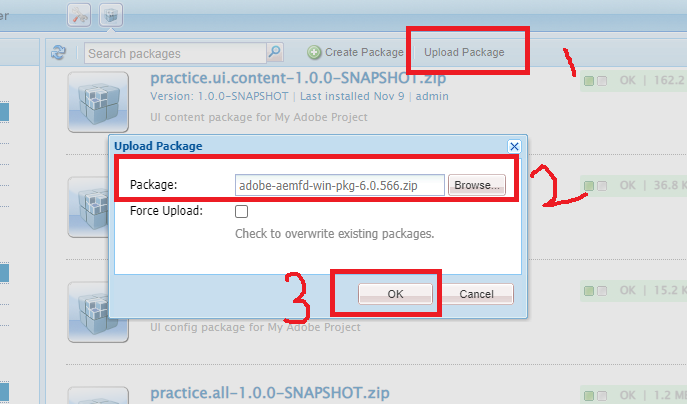
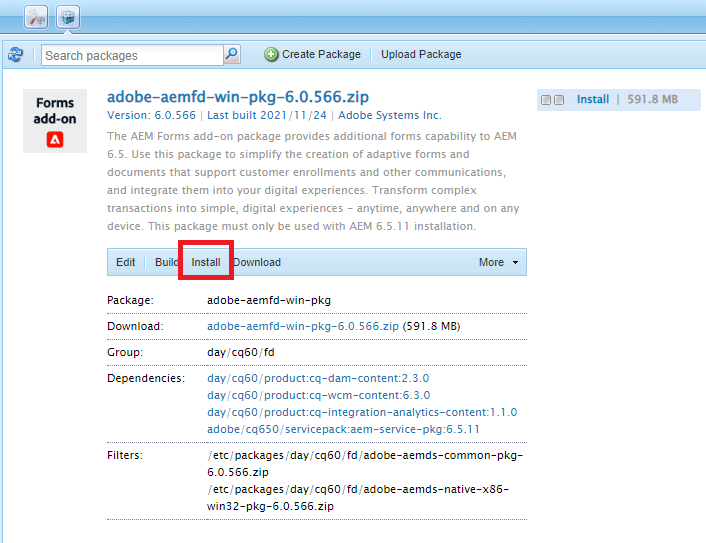
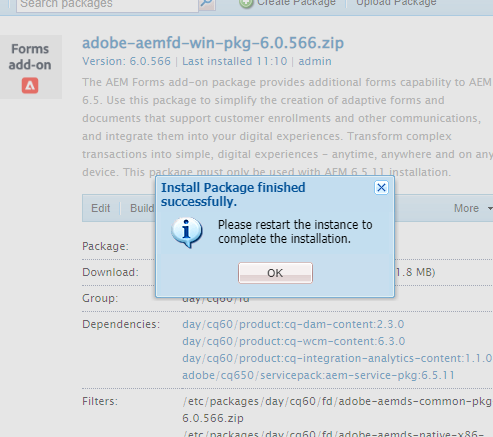
4. Click on install to install this package on AEM server as shown below.
It may take around 10–15 min for package installation.
5. Below pop up will get appear after successful installation asking for restart AEM server.
Let’s restart AEM server and verify.
5. Open below URL to verify Forms package got successfully installed or not.
Form problem statement
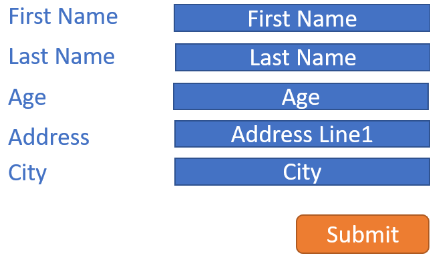
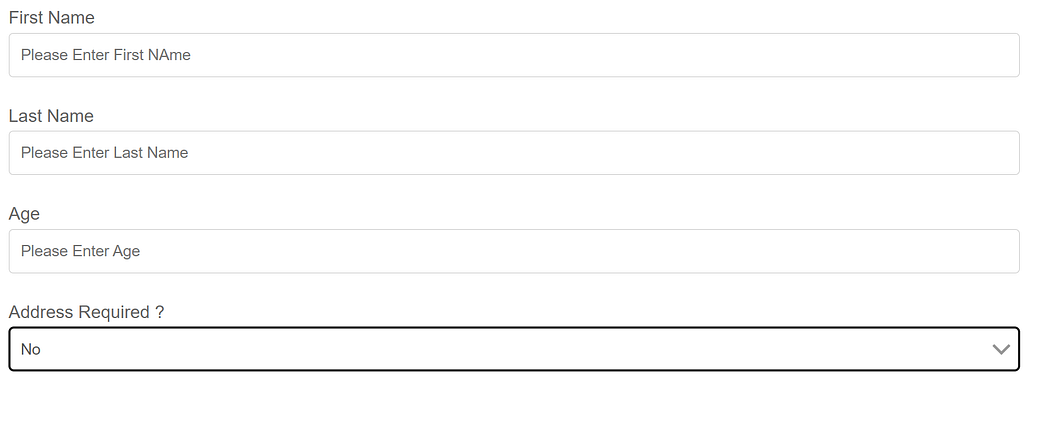
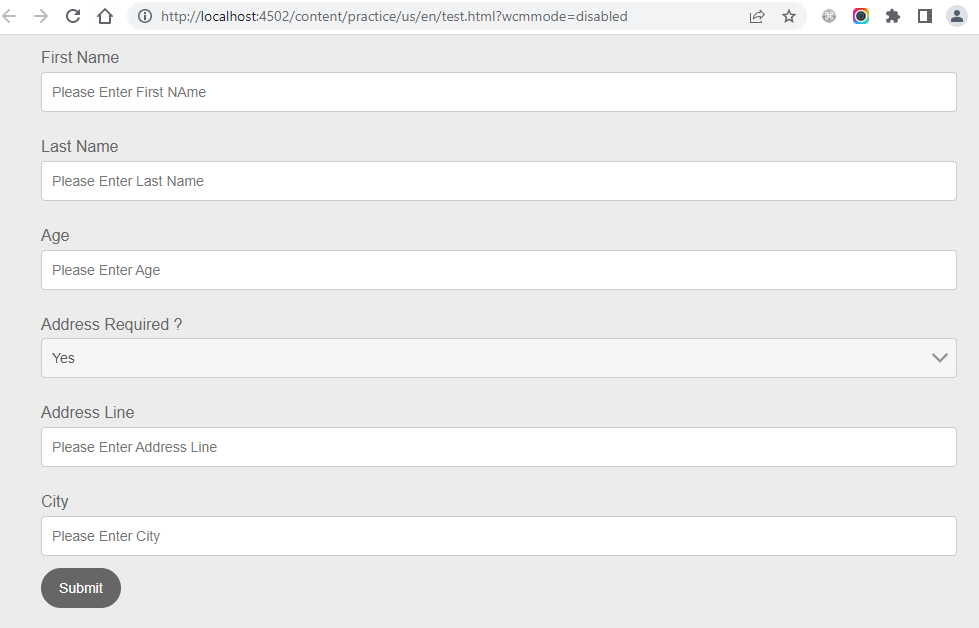
- As part of this blog, we are going to create below form:
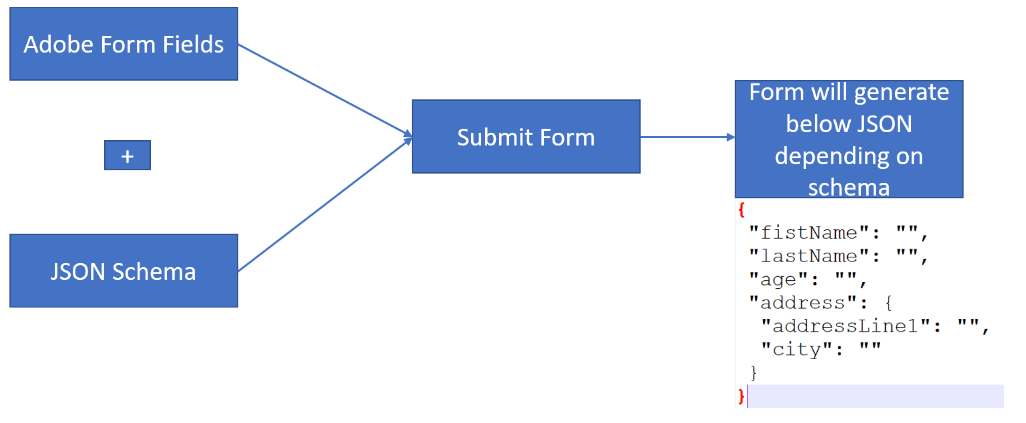
2. On Form submit it will generate below JSON
{
 "fistName": "",
 "lastName": "",
 "age": "",
 "address": {
  "addressLine": "",
  "city": ""
 }
}
3. Call custom AEM servlet to collect form submit data with predefined JSON format mentioned as part of step2.
Form submission Flow
Form contains number of fields. As we all know, On form submit 3rd party API or servlet will always expect data in some predefined format.
As part of this blog we will be using JSON Schema to collect data in the same predefined format which servlet and 3rd party API is expecting.
Adobe Forms Implementation
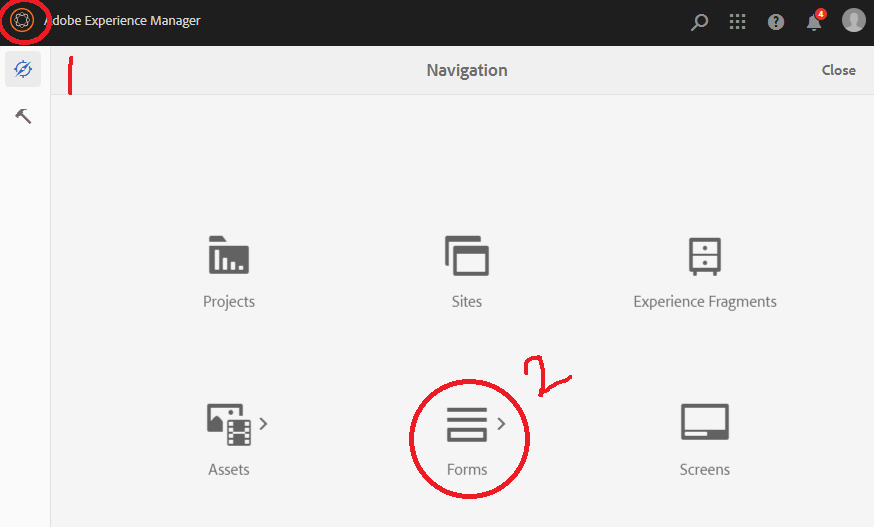
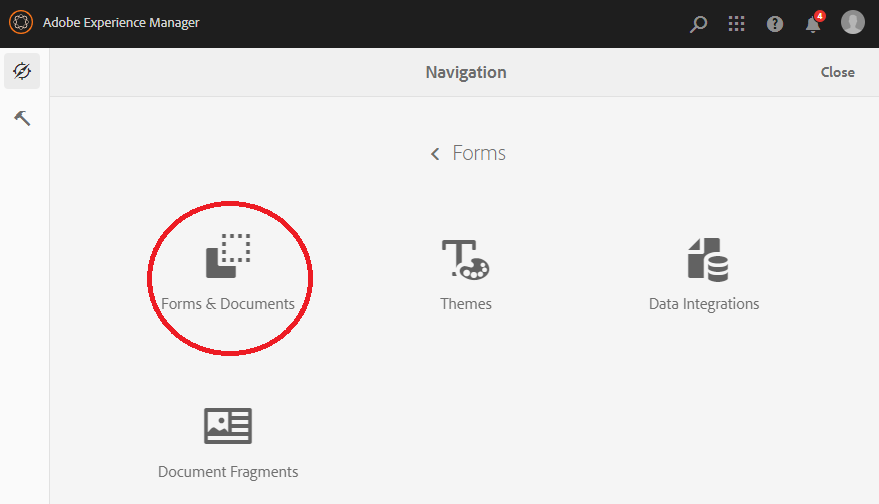
- Open below URL and click on Forms tile.
2. Click on below Forms & Documents tile:
Create and Upload Schema
3. As discussed earlier, lets create a JSON Schema as shown below which Servlet or 3rd party API is going to accept.
Store below schema file with <file_name>.schema.json extension.
{
  "$schema": "http://json-schema.org/draft-07/schema#",
  "$id": "http://example.com/product.schema.json",
  "title": "User",
  "description": "User Form",
  "type": "object",
  "properties": {
    "firstName": {
      "type": "string"
    },
    "lastName": {
      "type": "string"
    },
    "age": {
      "type": "string"
    },
    "address": {
      "type": "object",
      "properties": {
        "addressline": {
          "type": "string"
        },
        "city": {
          "type": "string"
        }
      }
    }
  }
}
Above JSON Schema will create below JSON as an output
{
 "fistName": "",
 "lastName": "",
 "age": "",
 "address": {
  "addressLine1": "",
  "city": ""
 }
}
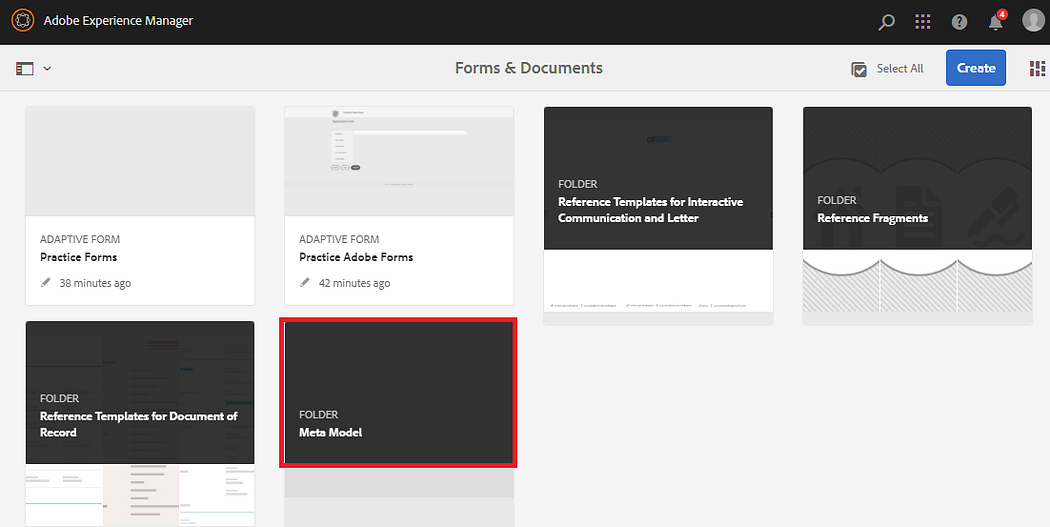
4. Select Meta Model tile as shown below.
5. Click on create button and select File Upload option to upload JSON schema. Choose above schema file and click on upload button as shown below.
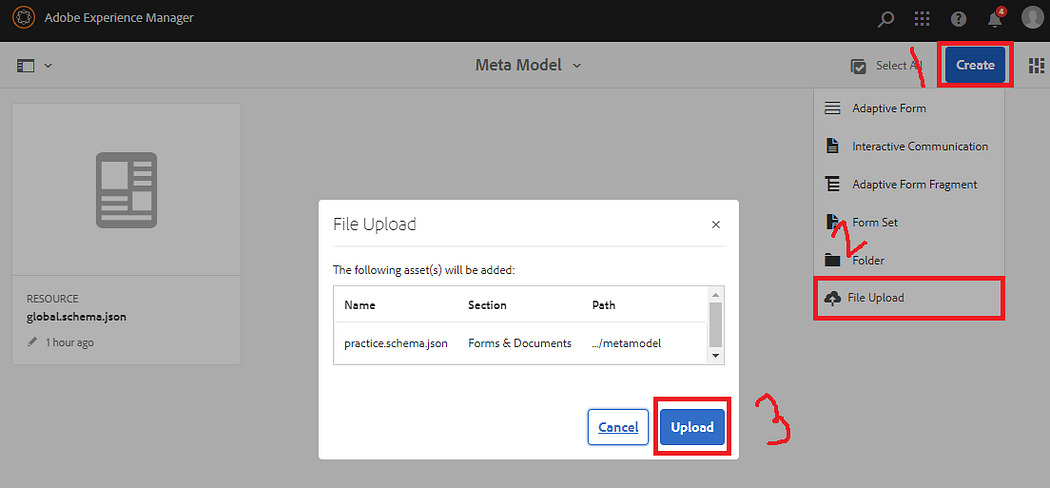
6. It will start appearing on successful upload as shown below:

Create Form
7. Go back and click on below Forms & Documents tile as shown below:
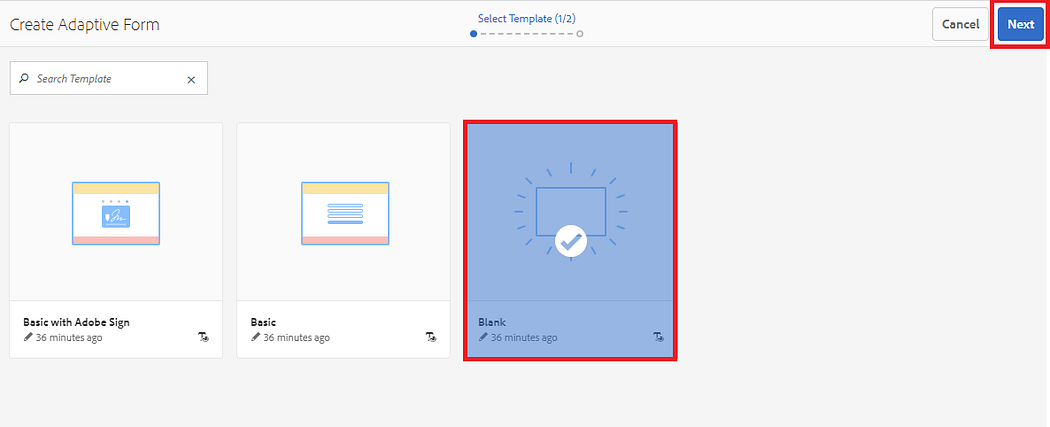
8. Select Blank template to create adaptive form and click on Next button.
9. Enter Title and Name on basic tab.
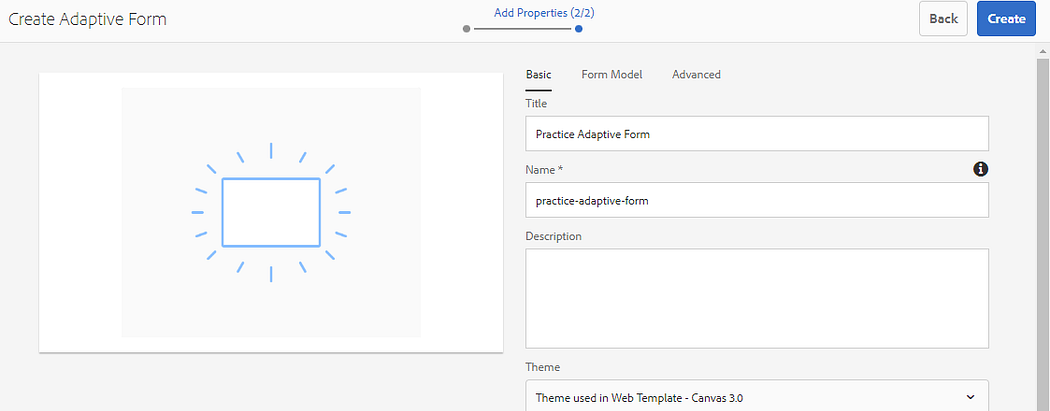
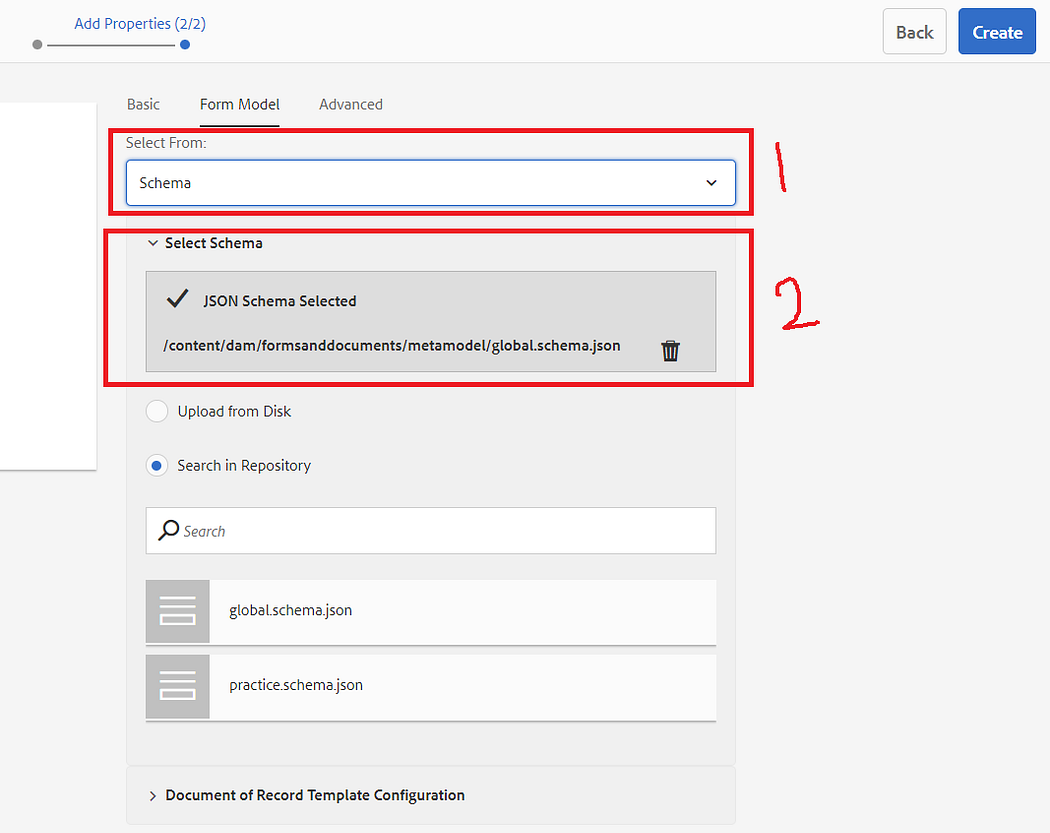
10. Select Form model tab and than select Schema as part of select From field. Select schema we uploaded as part of step6. Selected JSON Schema will help us to map form fields. Same JSON will go as part of post request data. This is the same format of JSON which servlet and 3rd party API is expecting:
Click on Create button to create a form.
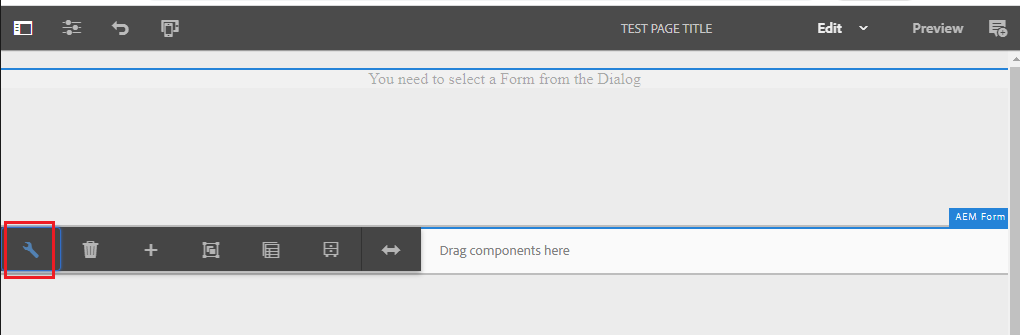
11. Click on Edit button to edit form for adding fields, submit actions and other required details.
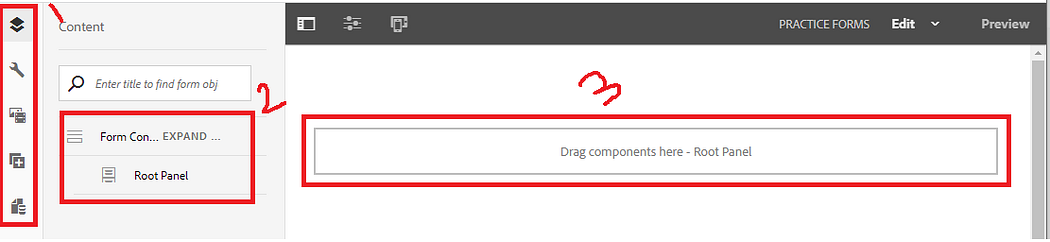
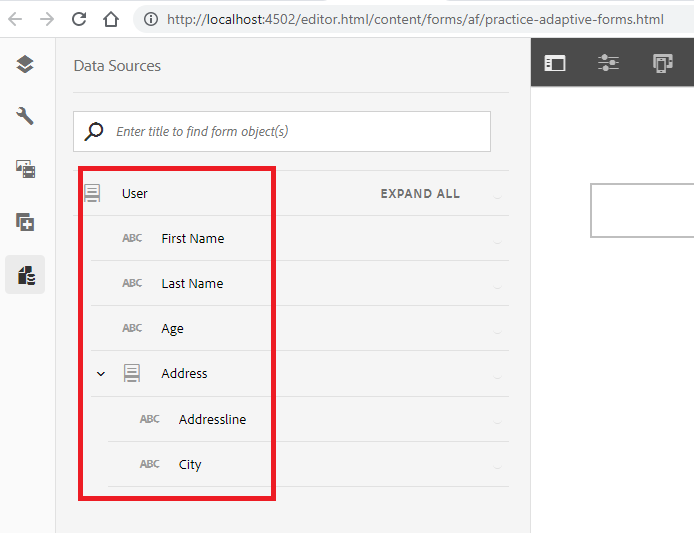
12. Highlighted point number 1 we will be discussion as part of subsequent steps.
Highlighted point number 2 will display content or field hierarchy we are going to drag and drop.
Highlighted point number 3 is to drag and drop form fields.
13. Navigate to below highlighted option and verify schema structure is present or not.
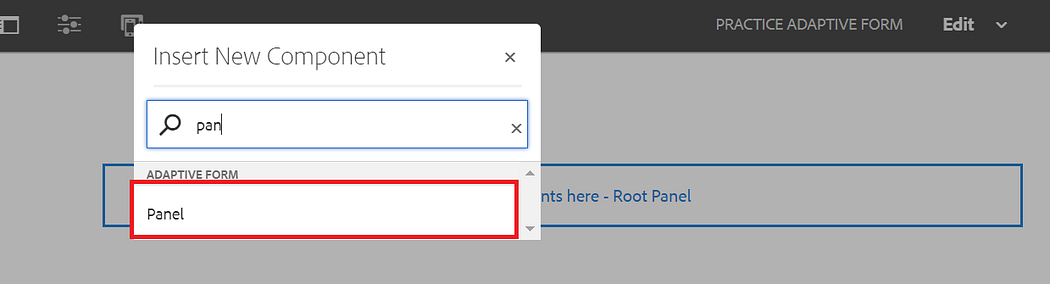
14. Clicking on Drag Components here — Root Panel parsys will provide a popup to select panel.
15. Select Drag component here — Section and click on + button to drag and drop components.
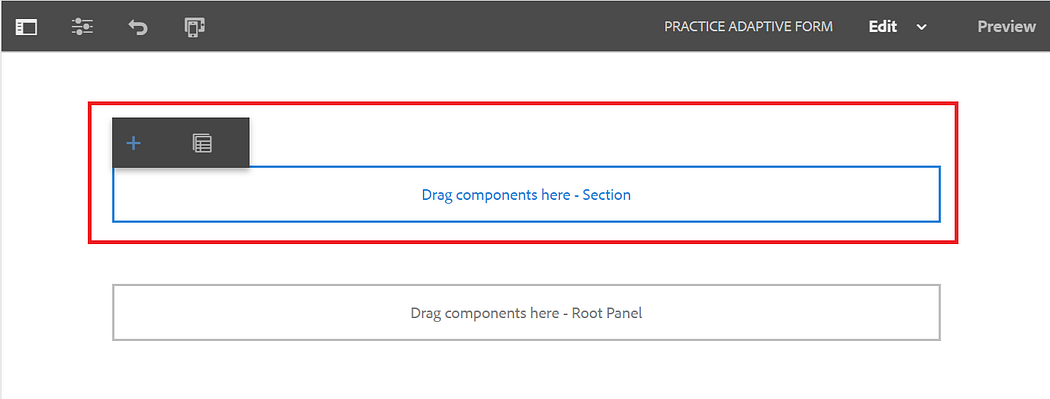
16. Select below Text Box option to have a text field.
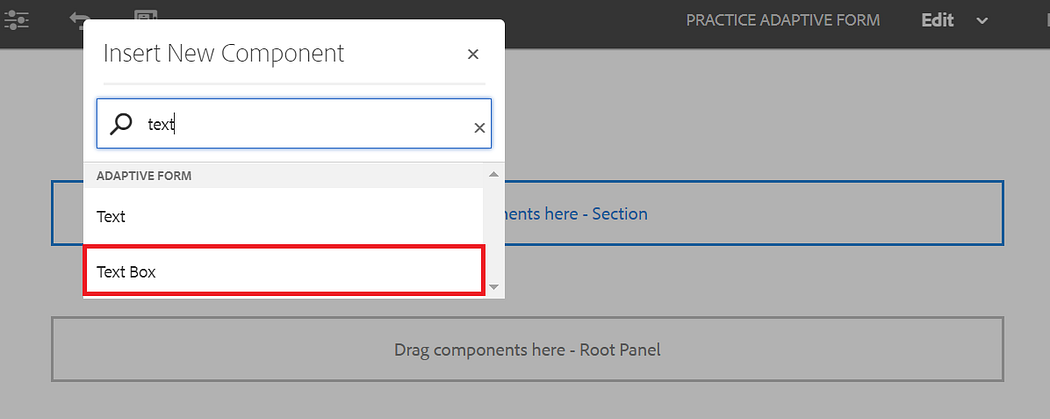
17. Select text box parsys and click on configure button will open left side navigation menu to fill field specific info.
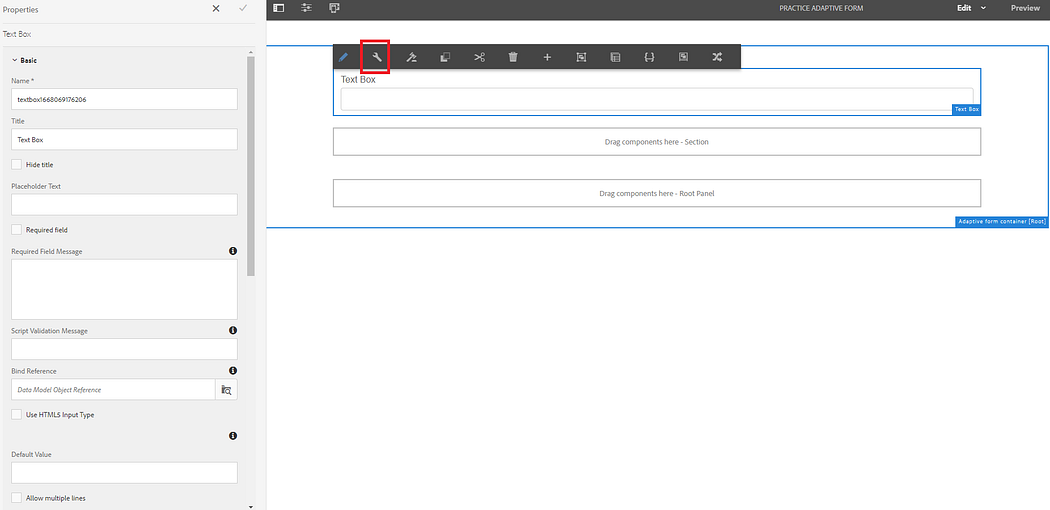
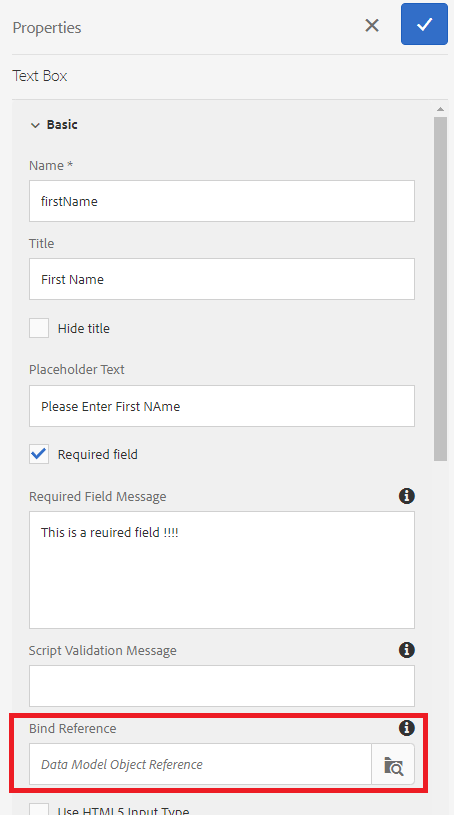
18. Provide Name, Title which will be a field label, placeholder, check the Required Field checkbox, provide Required Field Error Message.
Let’s discuss more about below highlighted Bind Reference field red in color. This field will help us to make a relation in between created field and earlier uploaded schema.
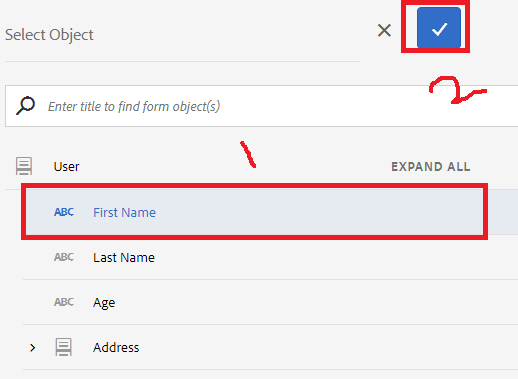
19. After clicking on bind reference option below screen will appear. Select required field and click on ok.
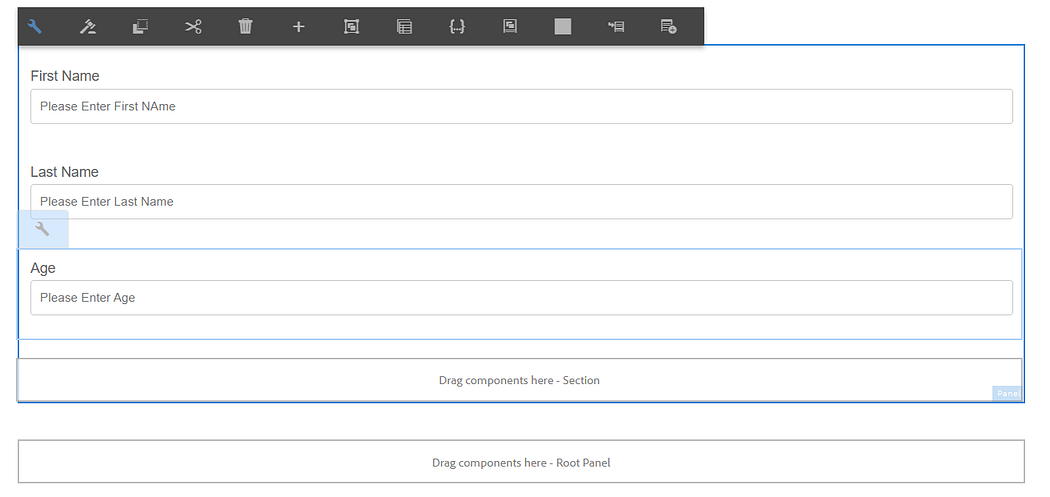
20. Repeat 15, 16, 17 and 18 steps for last name and age.
21. Drag drop and author drop down List as part of this step.

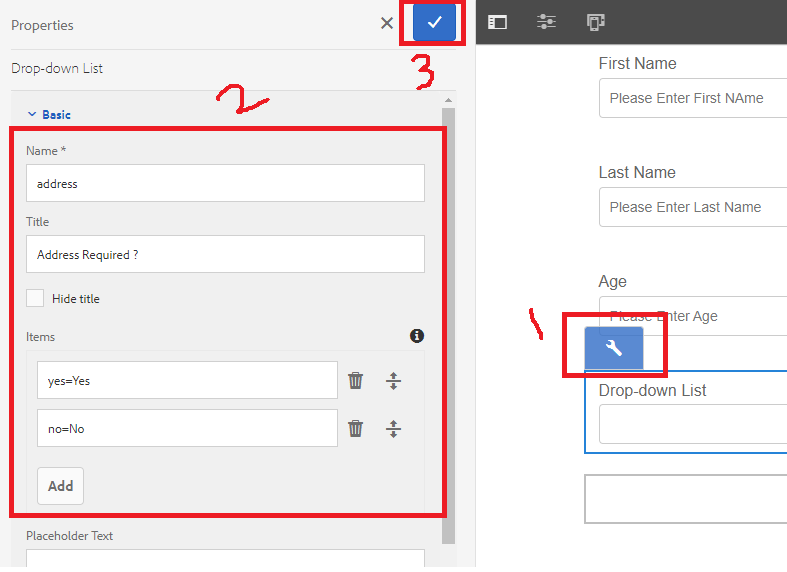
Note: This drop down we are going to use just of learning which will help us to learn some more features around Forms.
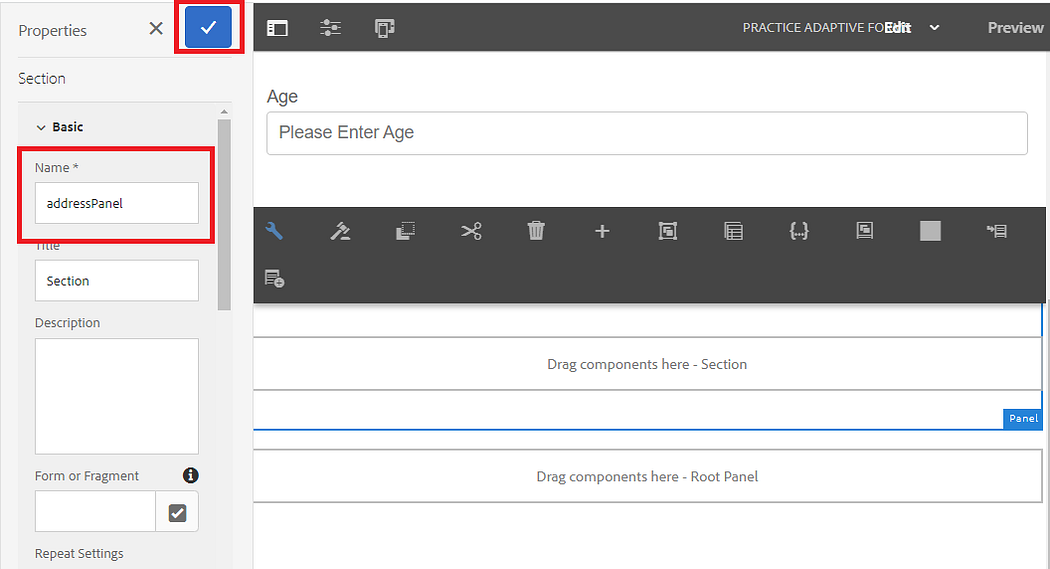
22. Configure Drop-down List and fill below highlighted values:
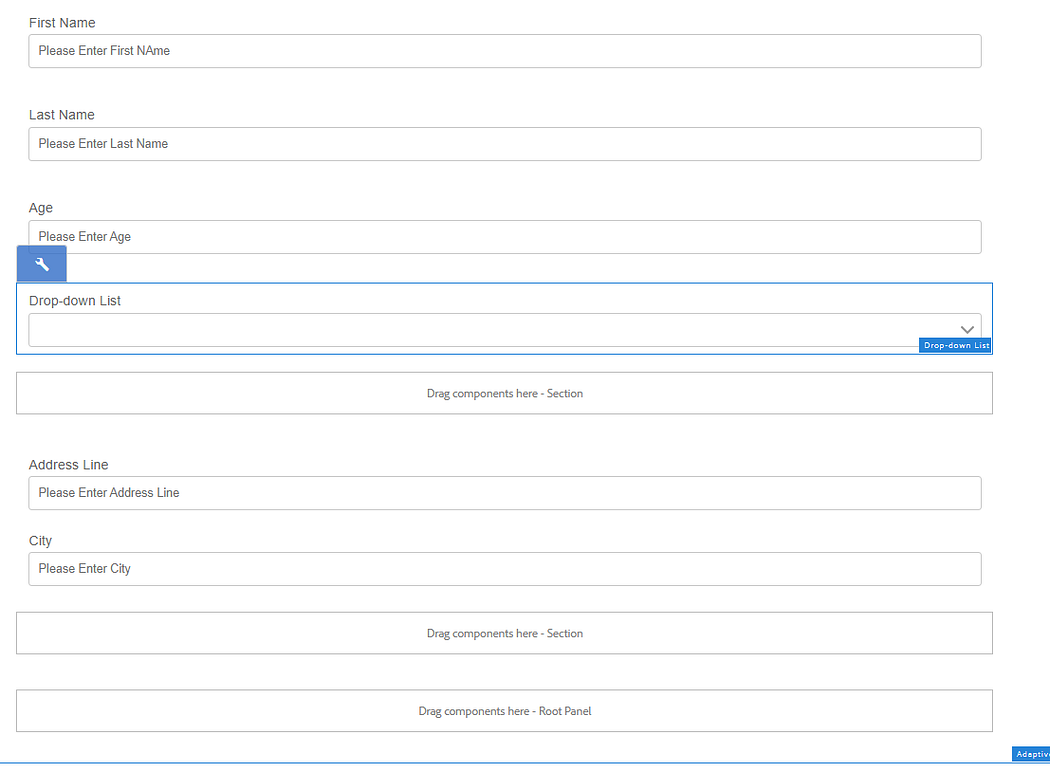
23. Drag and drop one more panel parallel to first panel. Provide a custom name to panel.
24. Inside 2nd panel drag and drop rest of the address line and city field repeating step number 15, 16, 17 and 18.
Note: Don’t make address line and city field required.
25. Address related field we wish to hide on page. This we can achieve by hiding all fields using OOTB configurations one by one which will be a cumbersome task. In place of that we can hide panel itself, under which we dragged and dropped all fields related to address as shown below.
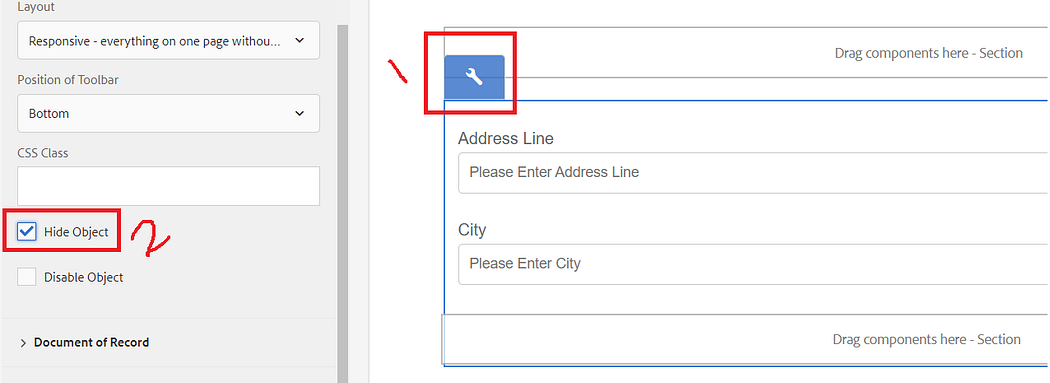
26. As part of form preview, address related field will not get appear.

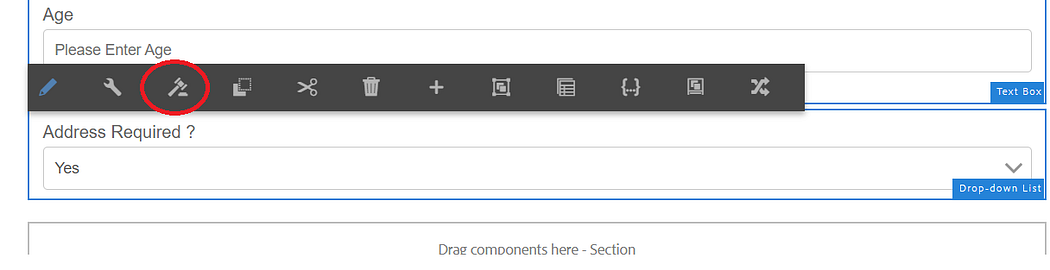
27. We wish to show all address fields on selection of Required field “yes” option.
Select below highlighted option to define that rule.
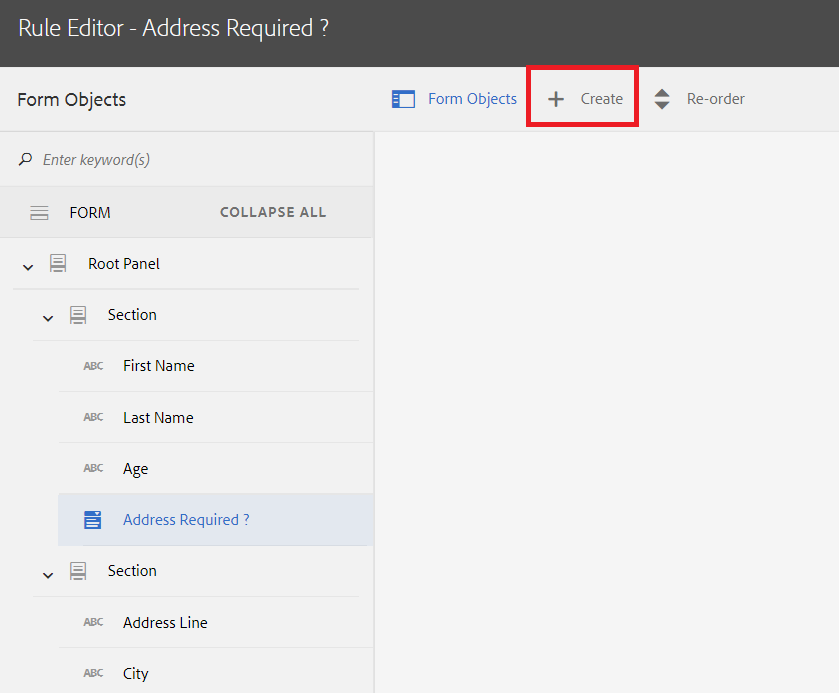
28. Click on below Create button to define a rule:
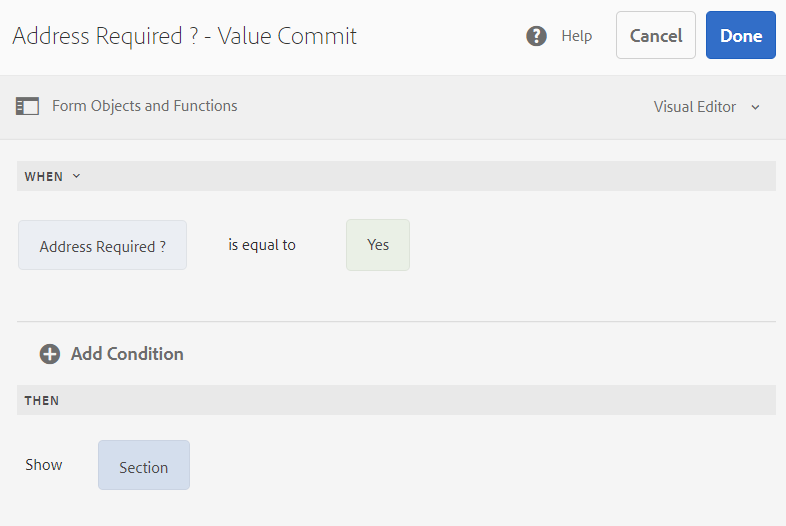
29. Define below rule to shown address section and all its fields on selection of “Yes” option from Address Required ? field and click on Done button.
30. Go to preview option and select Yes option will shown address field as shown below:
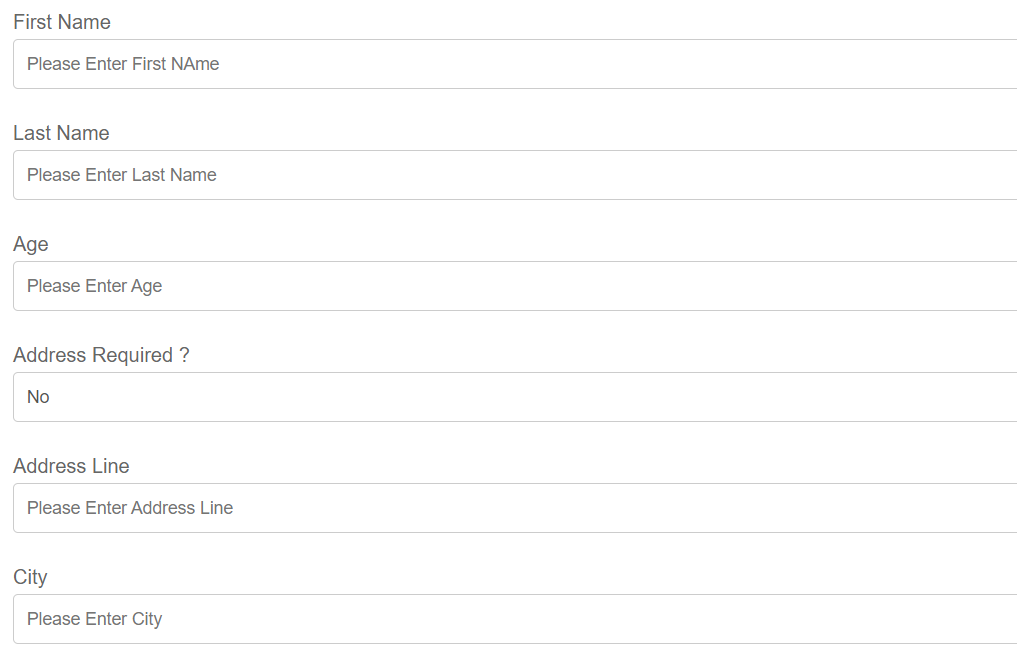
31. As part of this step we are going to write custom code to hide address section again on selection of No option of from Address Required ? field.
Repeat step number 26 and 27.
Select below option for traversing to code editor:


32. Paste below code inside inline code editor.
if (this.value == "no") {
    alert("Selected No");
    addressPanel.visible = false;
}
33. On selection of option as No will pop up an alert and hide address section and its fields.
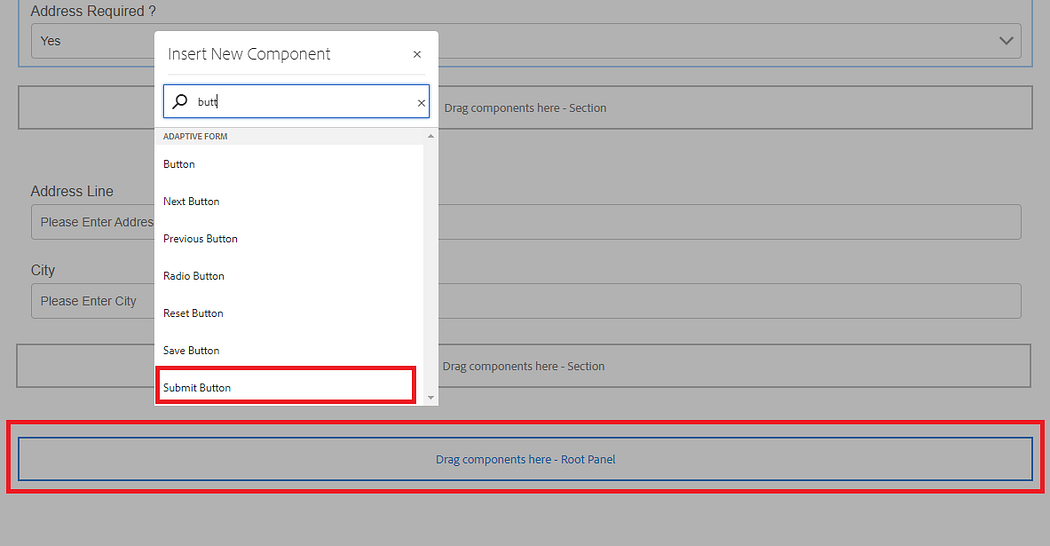
34. Let’s author a Submit Button for form submission:
35. Select top container and click on configure button to perform form level authoring and select Submit to REST endpoint option under Submit Action dropdown field.
Form submission will be a POST request call as we are going to send user form data as part of request payload.
Select Enable POST request checkbox and provide 3rd party API or servlet URL as part of URL For POST request field.

Create content page and consume AEM Form
36. Check the checkbox to allow AEM Form under General group as part of template to drag and drop on the page.

37. Create page, drag and drop AEM Form component.
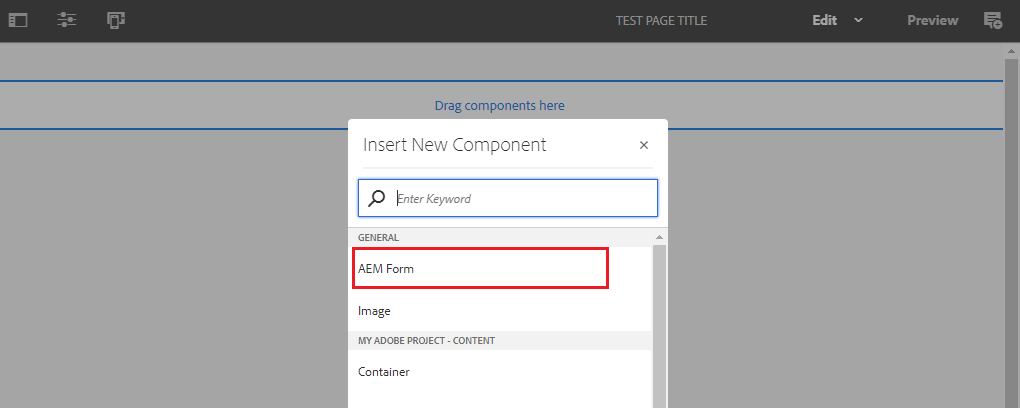
38. Configure component using below highlighted option.
39. Provide AEM Form path we creates as part of this blog under Asset Path field and click on ok will load AEM form on page.
As part of this dialog, we can also provide Thank you page URL or message.

40. It will load below content page with AEM Form
41. Create below POST Servlet to collect data
Submitted data comes as a parameter and can be collected usign below syntax.
req.getParameter(“dataXml”)
import org.apache.sling.api.SlingHttpServletRequest;
import org.apache.sling.api.SlingHttpServletResponse;
import org.apache.sling.api.servlets.HttpConstants;
import org.apache.sling.api.servlets.SlingAllMethodsServlet;
import org.osgi.framework.Constants;
import org.osgi.service.component.annotations.Component;
import org.slf4j.Logger;
import org.slf4j.LoggerFactory;

import javax.servlet.Servlet;
import java.io.IOException;

@Component(
    service=Servlet.class,
    property={
        Constants.SERVICE_DESCRIPTION + "=Custom Servlet",
        "sling.servlet.methods=" + HttpConstants.METHOD_POST,
        "sling.servlet.paths=" + "/bin/user"
    }
)
public class UserDetailServletByPath extends SlingAllMethodsServlet {
    private static final long serialVersionUID = 1L;
    private final Logger logger = LoggerFactory.getLogger(getClass());

    @Override
    protected void doPost(final SlingHttpServletRequest req,
        final SlingHttpServletResponse resp) throws IOException {        logger.error("User >>>> {}", req.getParameter("dataXml"));        resp.setStatus(SlingHttpServletResponse.SC_OK);
        resp.setContentType("application/json;charset=UTF-8");
        resp.getWriter().print("{\"response message\" : \" Service Called\"}");
    }
}
42. Fill form with below values and collect values as part of Post servlet (/bin/user) after submission.
OUTPUT:
Check error.log file to validate values submitted as pat of form.

{
 "afData": {
  "afUnboundData": {
   "data": {
    "address": "yes"
   }
  },
  "afBoundData": {
   "data": {
    "firstName": "John",
    "lastName": "Carter",
    "age": "28",
    "address": {
     "addressline": "Victoria",
     "city": "Washington"
    }
   }
  },
  "afSubmissionInfo": {
   "computedMetaInfo": {},
   "stateOverrides": {},
   "signers": {}
  }
 }
}
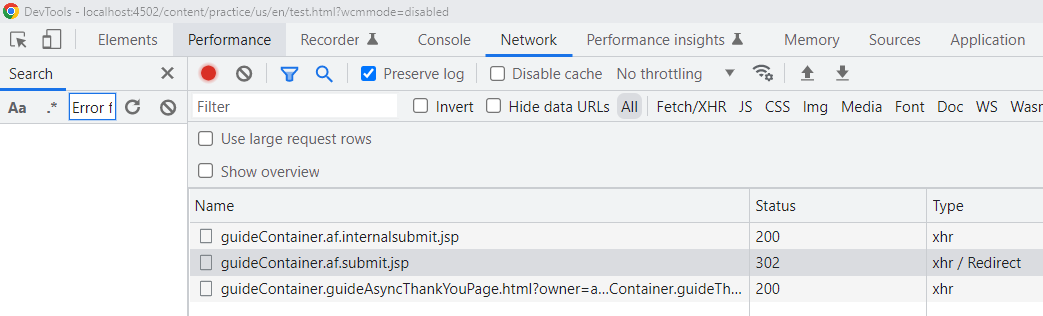
Successful form submission will make below three subsequent calls:

Imran Khan, Adobe Community Advisor, certified AEM developer and Java Geek, is an experienced AEM developer with over 12 years of expertise in designing and implementing robust web applications. He leverages Adobe Experience Manager, Analytics, and Target to create dynamic digital experiences. Imran possesses extensive expertise in J2EE, Sightly, Struts 2.0, Spring, Hibernate, JPA, React, HTML, jQuery, and JavaScript.