Javadoubts
Struts Maven Hibernate Apache Tomcat Dynamic Webapp
In this tutorial we are going to discuss more on Struts Maven Hibernate Apache Tomcat Dynamic Webapp. This is a very rare combination anyone will explain in detail to use Maven, Struts2, Hibernate and maven Archetype as maven-archetype-webapp to create a end to end application.
In this tutorial, I attempted to explain each step of creating a Maven-based Struts 2 + Hibernate application. It was a time-consuming task, but at the end of the day, it was completed and delivered successfully.
Lets start our journey to go through and learn complete implementation.
We are going to use Eclipse as an editor to develop Maven + Struts2 + Hibernate application.
Follow below steps to create our very first Struts application project.
1. Open Eclipse.
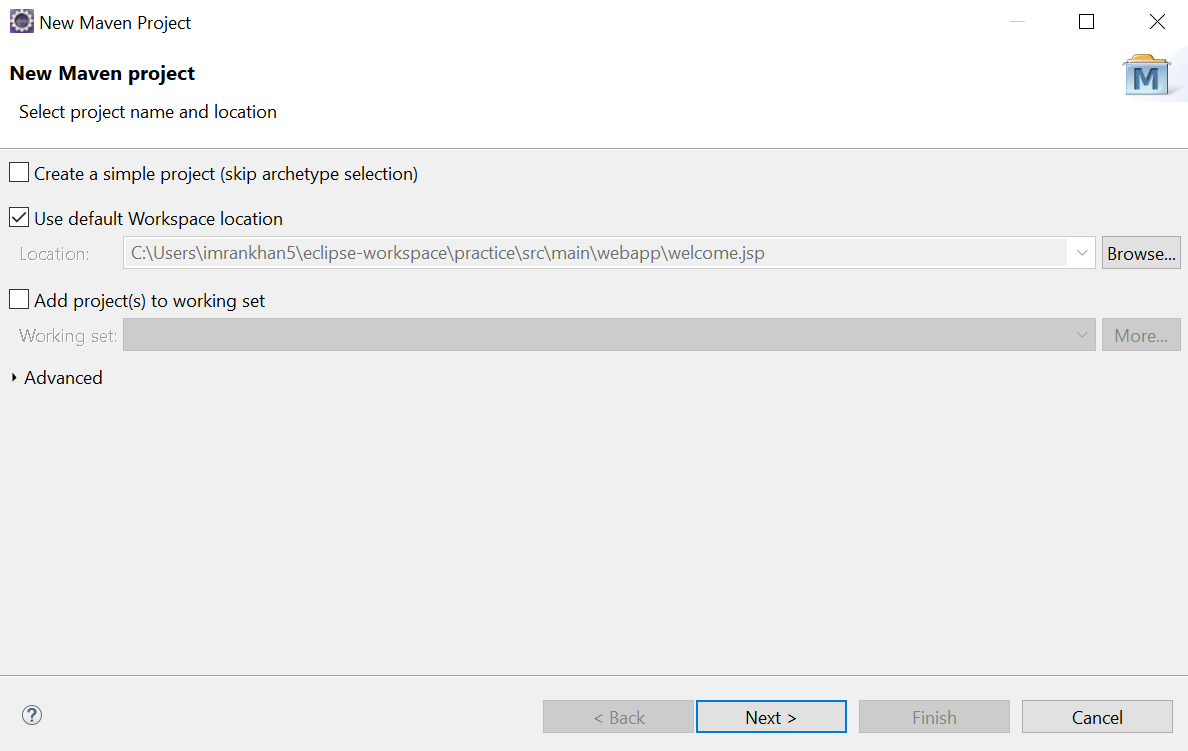
2. Click on File in top navigation menu and than click on new. There will be an option Maven Project start coming. Select Maven Project will take you to the below screen.
Do not make any change and click on Next.
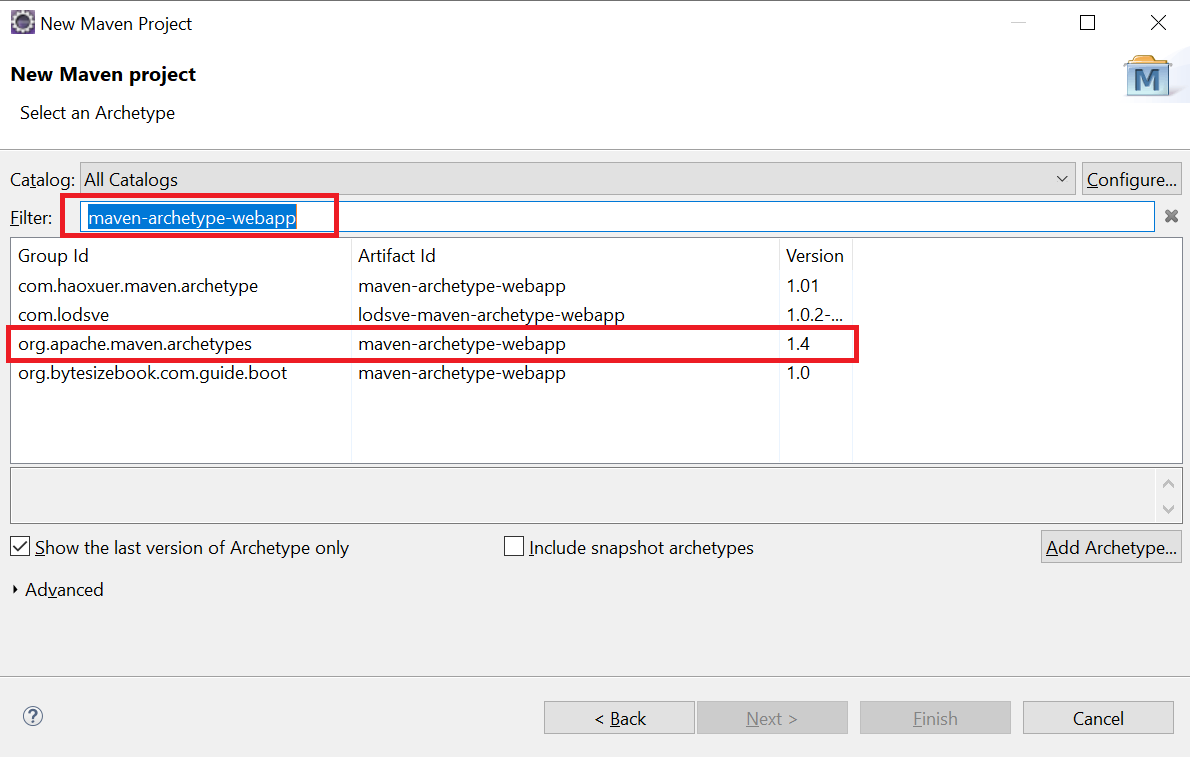
3. In the filter section type maven-archetype-webapp will give you list of options to select.
Select below below second highlighted option red in color and click on Next.
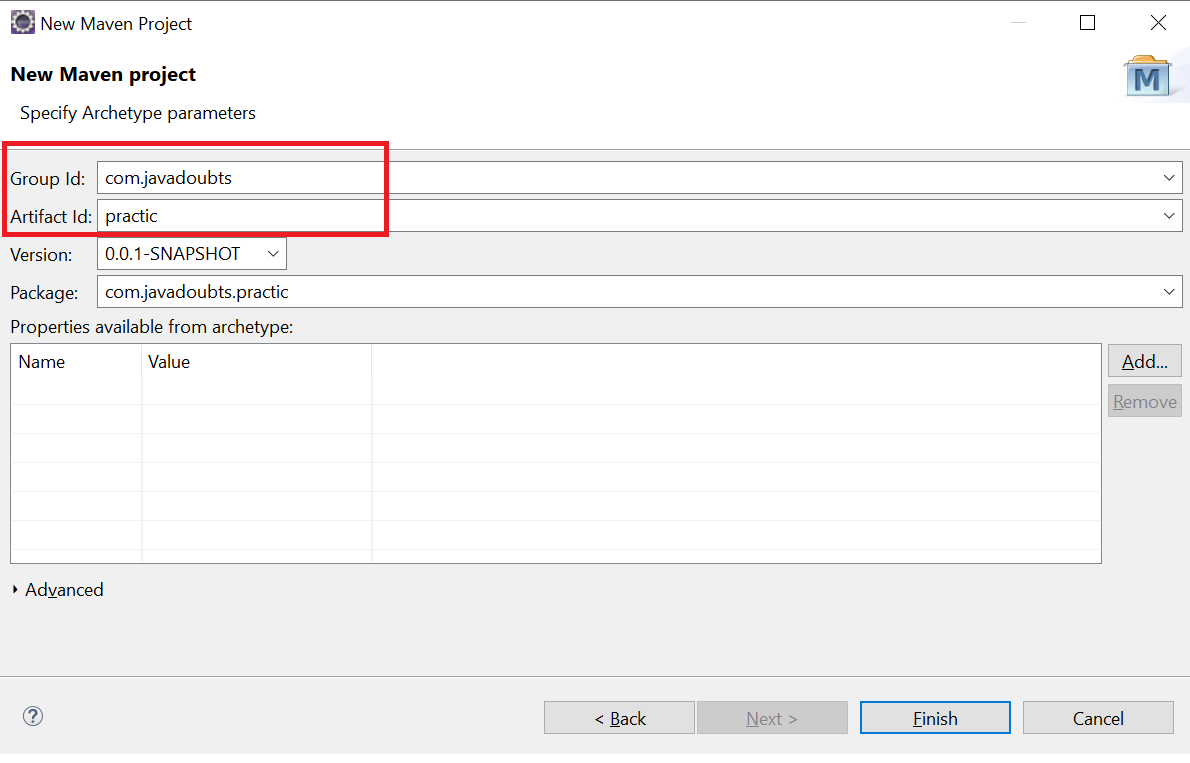
4. Enter Group Id and Artifact Id as highlighted below red in color.
Click on Next will create a project.
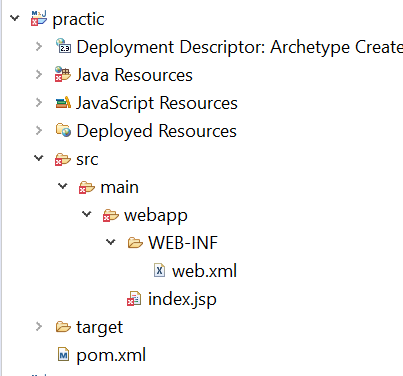
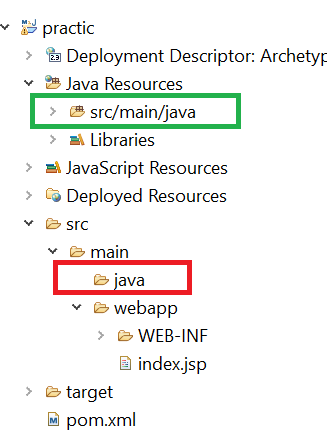
5. It will create below folder structure
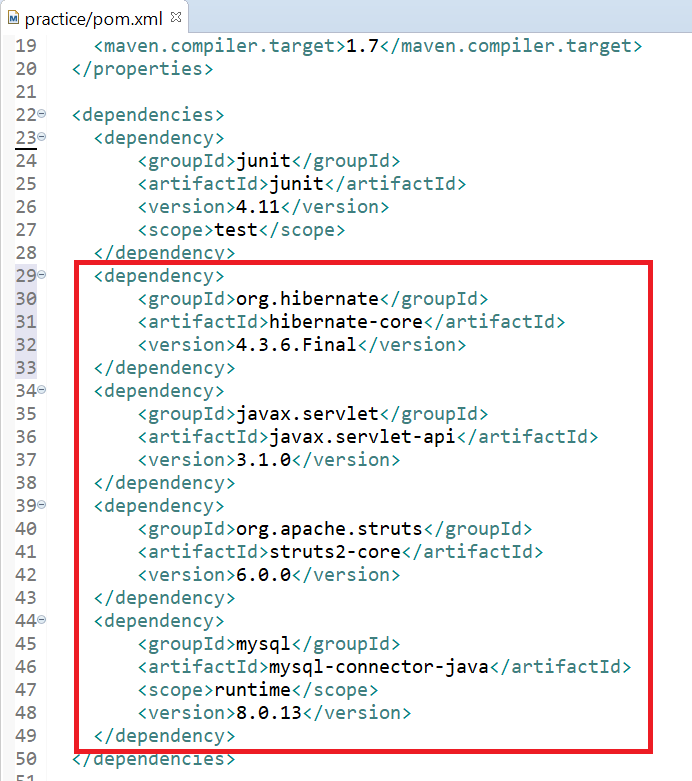
6. Open pom.xml and place below highlighted dependency red in color.
Hibernate Implementation
7. Lets configure Hibernate first in the project. Inside src we have main folder. Right click on the main folder and create one Java folder as shown below highlighted red in color.
It will also create a folder hierarchy highlighted green in color.
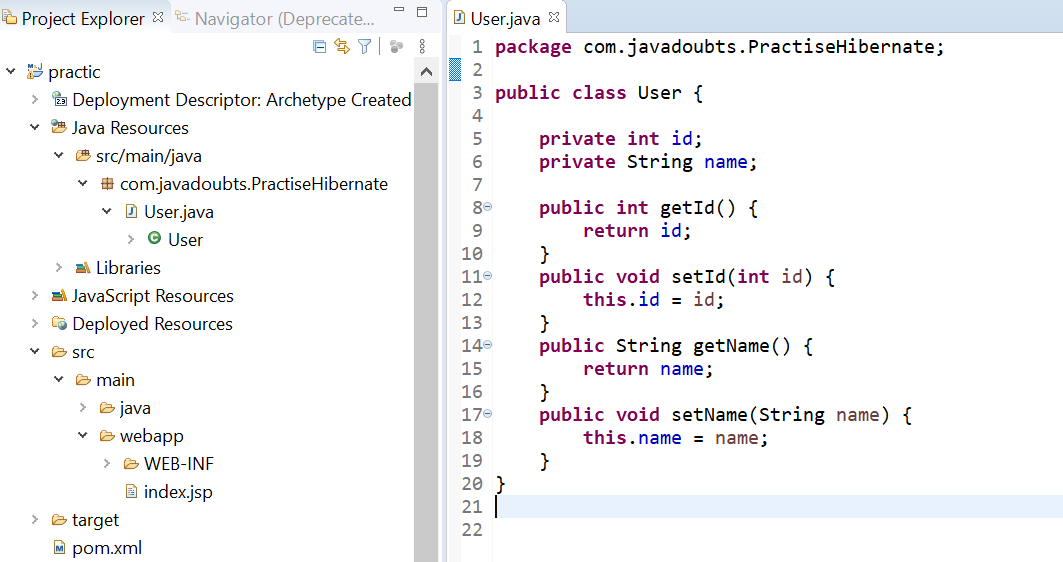
8. Right click on the folder highlighted green in color in previous step and create package with name com.javadoubts.PractiseHibernate
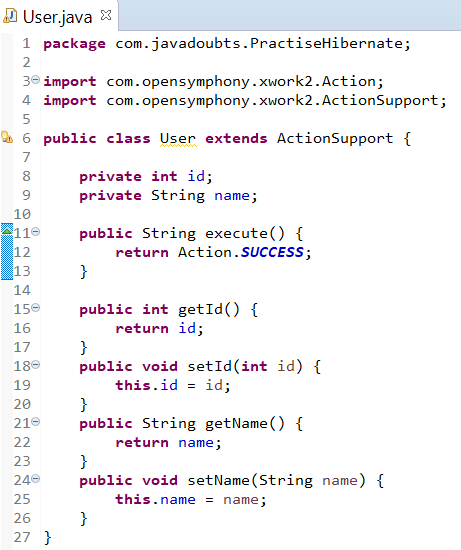
In the same package create User.java class with below content.
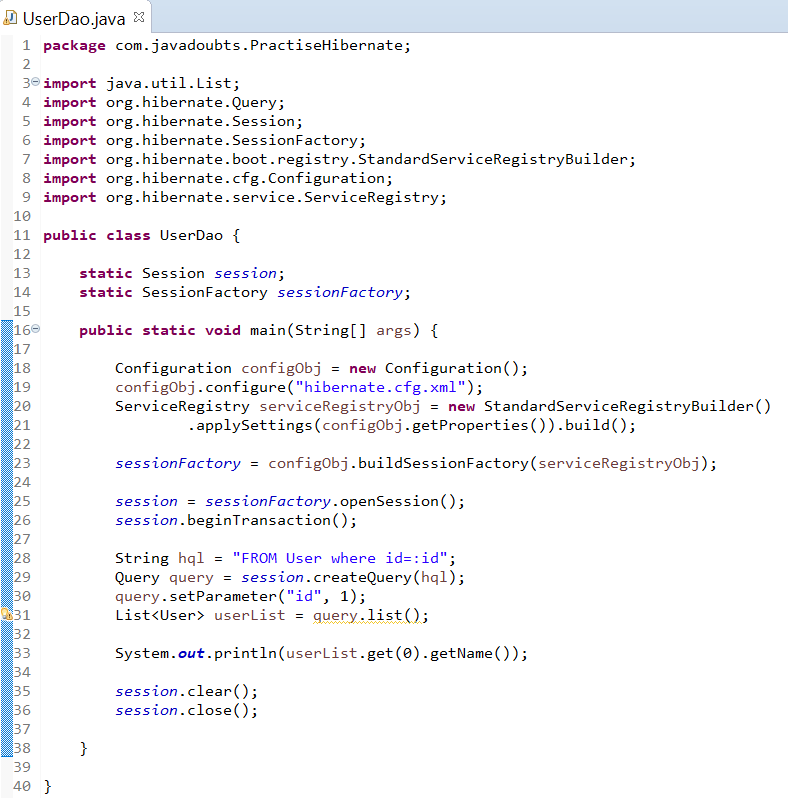
9. In the same package and parallel to User.java class, create UserDao.java class with below content.
10. Inside src folder and parallel to java folder, create once more folder with the name of resources as highlighted below red in color.
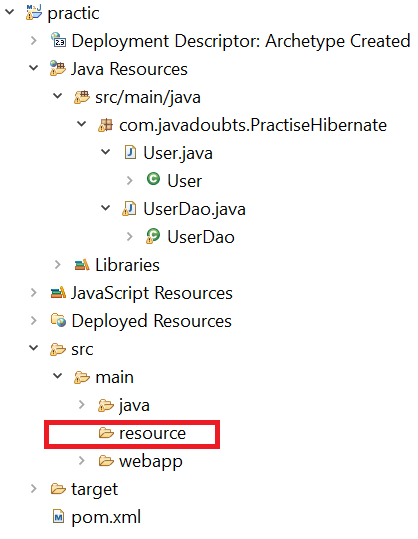
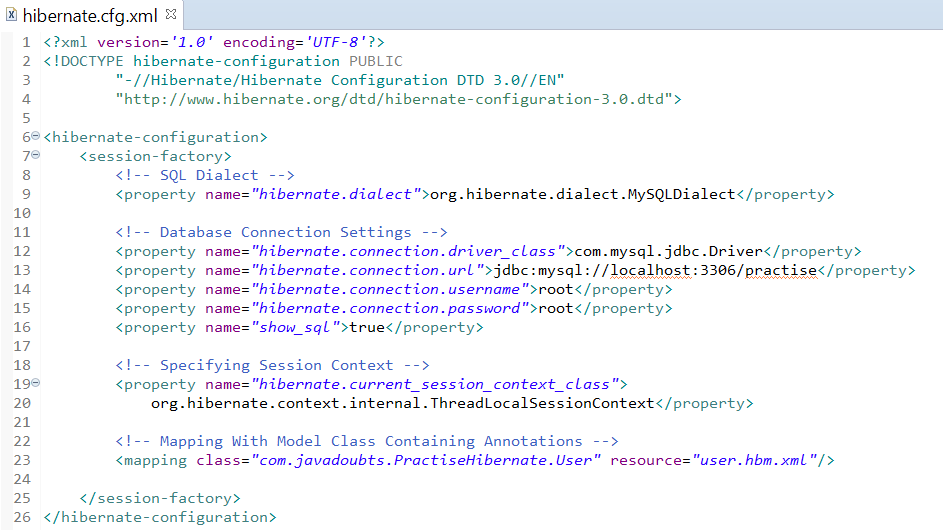
11. Paste below hibernate.cfg.xml and user.hbm.xml files inside resource folder created in above step having below inline content.
hibernate.cfg.xml
user.hbm.xml

Important Note:
After adding both the above xml files. Right on resource folder select Build Path and than Use as Source Folder.
Right click on resource folder -> Build Path -> Use as Source Folder
<hibernate-mapping> contains all bean class mappings.
<class> create mapping in between class and table. name attribute value represents to class name and table attribute value represents to MySQL table name.
<property> represents to class declare class level variable. name attribute value represents to class level variable and type represents to data type of that variable.
<column> represents to column MySQL table. name attribute value represents to column name.
<id> represents to unique ID attribute in class map to the primary key of the database table.
<generator> this helps to generate unique id for given column.
12. Open MySQL command prompt. Create and data inside user table with the help of below query.
create table user(id int NOT NULL AUTO_INCREMENT, name varchar(20), primary key(id));
insert into user value(1, “John”)
12. Open UserDao.java class, right click and run as Java application will give below output.

Struts Implementation
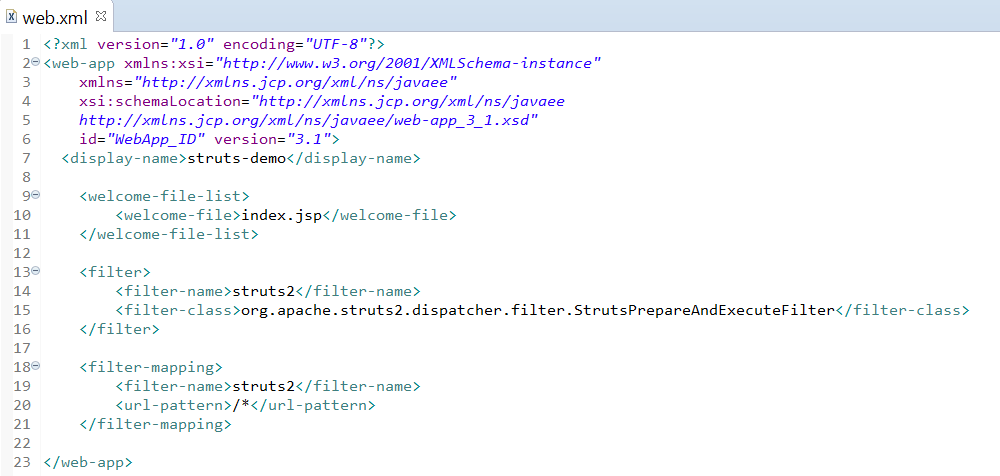
13. In web.xml folder below content to load index.jsp file as soon as server starts up and also load Struts2 configurations.
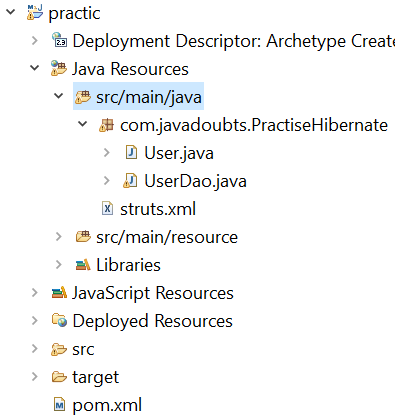
14. Create struts.xml inside src/main/java folder highlighted as blue in color.
15. Place below content inside struts.xml file create in previous step.
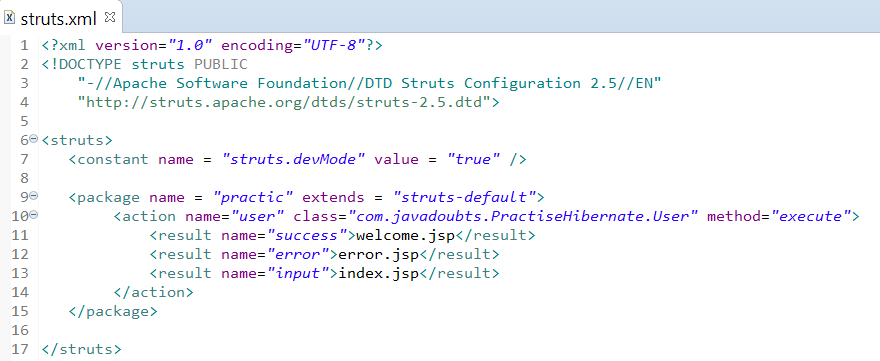
<action> tag will help us to create an action.
class: class attribute in action tag will take class with complete package name as value.
method: Declare method name which which belong to a class declared in class attribute in action tag.
name: name attribute in action tag is to map an action which will get call after hitting below url as an example.
e.g. → http://localhost:8081/practic/user.action
<result> result tags will maintain a mapping. This mapping will be responsible for calling an action or interceptor at the time of the request reaching the server and also for loading a specific JSP as in response.
16. Update User.java class with below content to add execuet() method.
17. Place below highlighted file with below inline content inside webapp folder:
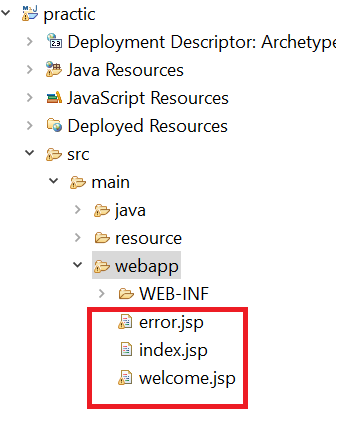
error.jsp

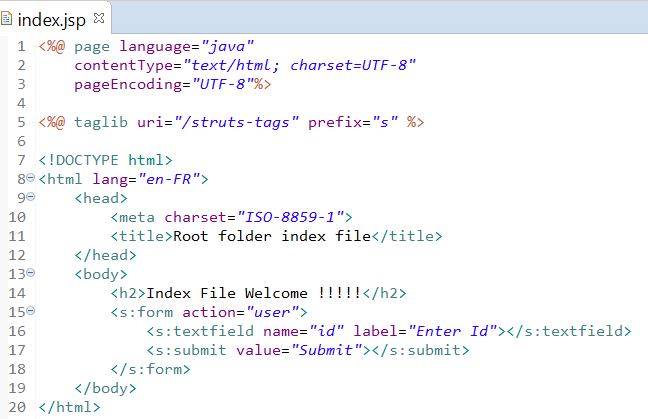
index.jsp
welcome.jsp

18. Right click on the project root folder practic and select Run As and than Run on Server.
Below screen will appear as soon as server gets started.
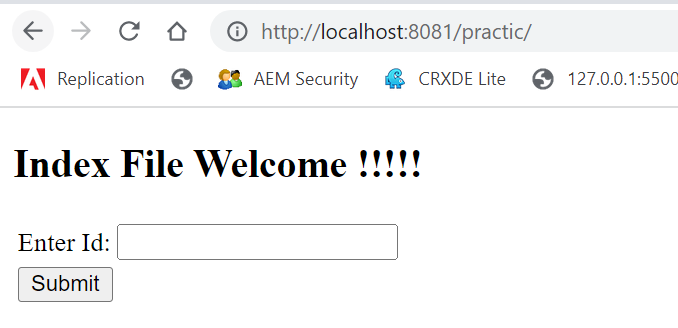
19. Hit below URL in chrome browser to test struts application
http://localhost:8081/practic/user.action
Struts2 + Hibernate integration
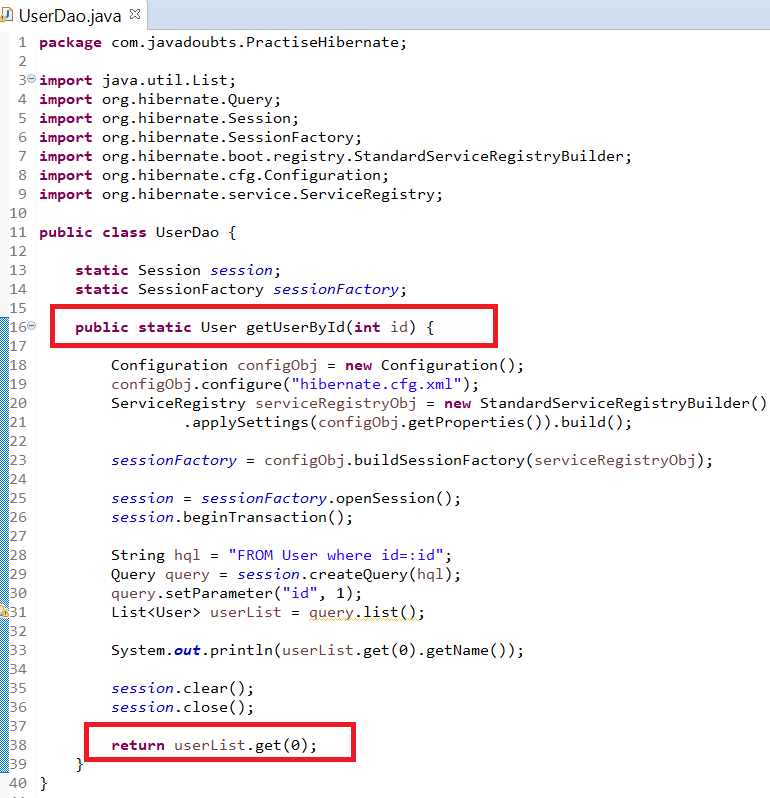
20. Update UserDao.java class with below highlighted changes red in color.
As part of update change method name from main(String[] args) to getUserById(int id).
Change return type form String to User.
Please find below updated changes highlighted as red in color.
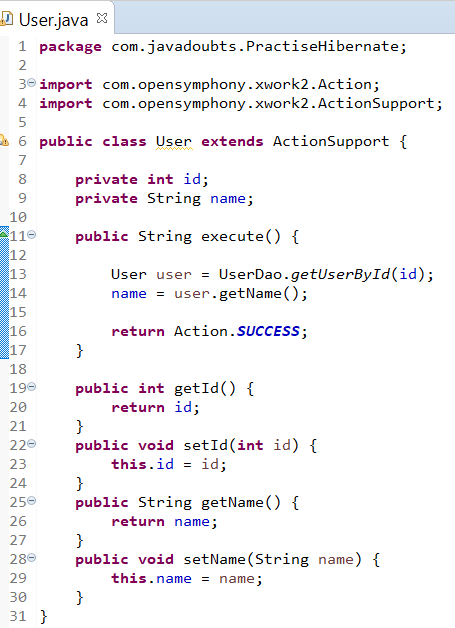
21. Update User.java class also with below highlighted changes red in color.
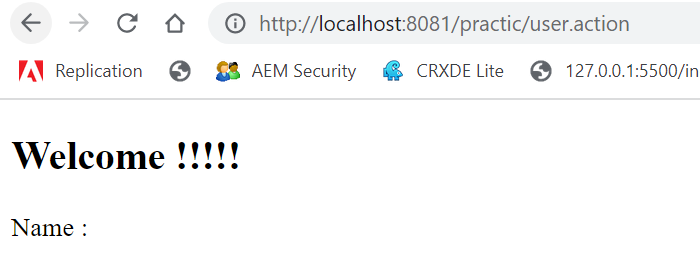
22. Again, right click on the project root folder practic and select Run As and than Run on Server.
Below screen will appear as soon as server gets started.
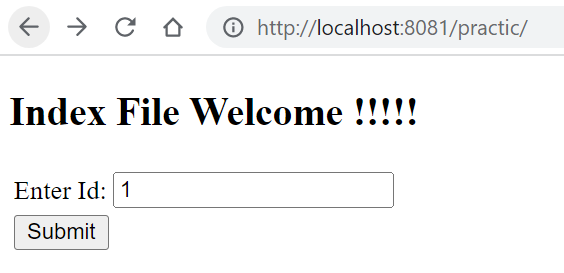
After entering one and Submit form will take us to welcome.jsp and show below output to print name.
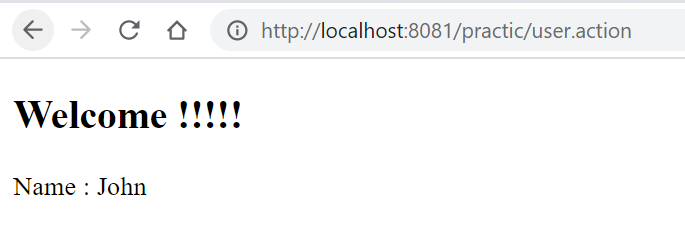

Imran Khan
Specialist Master (Architect) with a passion for cutting-edge technologies like AEM (Adobe Experience Manager) and a proven track record of delivering high-quality software solutions.
- Languages: Java, Python
- Frameworks: J2EE, Spring, Struts 2.0, Hibernate
- Web Technologies: React, HTML, CSS
- Analytics: Adobe Analytics
- Tools & Technologies: IntelliJ, JIRA
📝 Blogs
javadoubts.com © All rights reserved