Javadoubts
Servlet RequestDispatcher
Servlet RequestDispatcher is an interface which belongs to javax.servlet package.
As name suggests, Request dispatcher is responsible to dispatch request to another resource such as Servler, JSP, HTML, etc.
RequestDispatcher interface is having two important methods named as forward and include.
- public void forward(ServletRequest request, ServletResponse response) throws ServletException, java.io.IOException
This method is used to forward a request from a servlet to other resources such as Servlet, JSP, HTML, etc.
2. public void include(ServletRequest request, ServletResponse response) throws ServletException,java.io. IOException
This method will include content of other resources such as Servlet, JSP page, or html file) in the servlet response object.
There are two ways to get a RequestDispatcher Object.
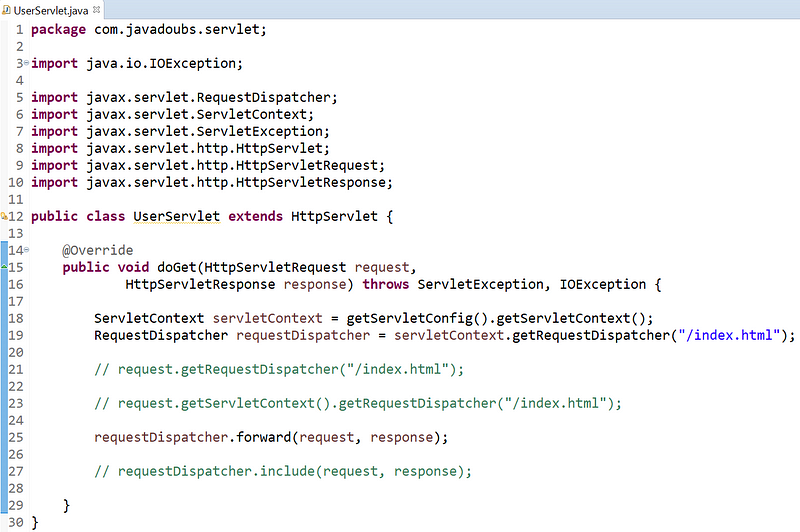
1. Using getRequestDispatcher(String path) method as shown below:
Using this method request can be dispatch to a specified relative path.
Below are the various ways to access RequestDispatcher.
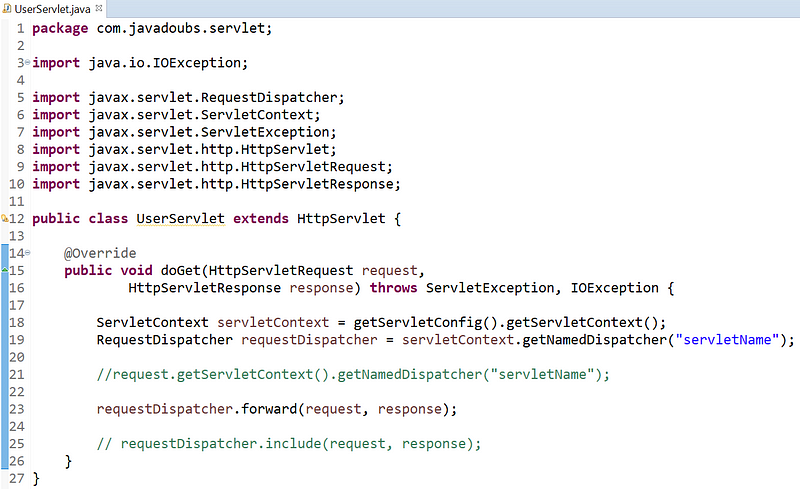
2. Using getNamedDispatcher(String servletName) method as shown below:
Using this method request can be dispatch to a Servlet.
Below are the various ways to access RequestDispatcher Object.
Note: In case of include and forward, browser URL will never change. It will show same URL in the browser.
Example
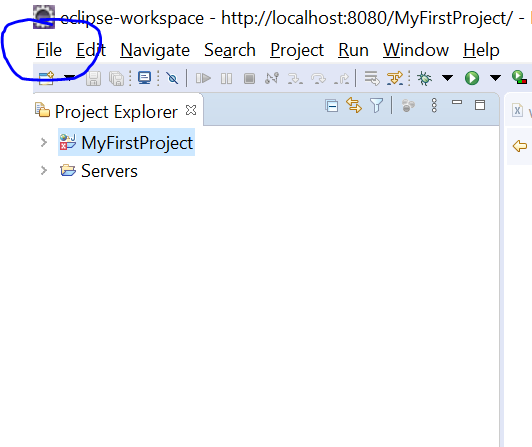
- Open eclipse and Click on File as highlighted below.
File → New → Other
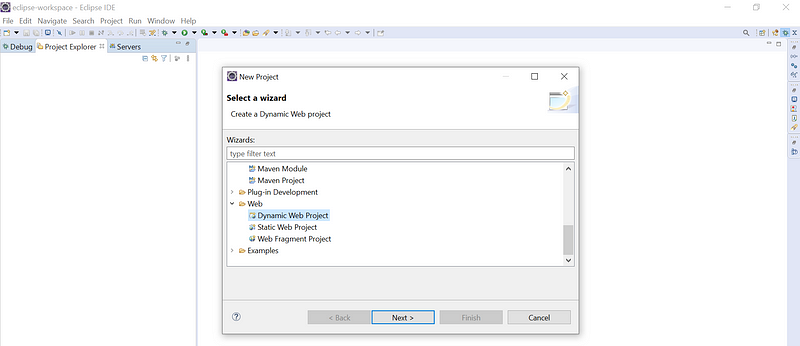
2. Select “Dynamic Web Project” and click on “next” button will help us to create project related to servlet.
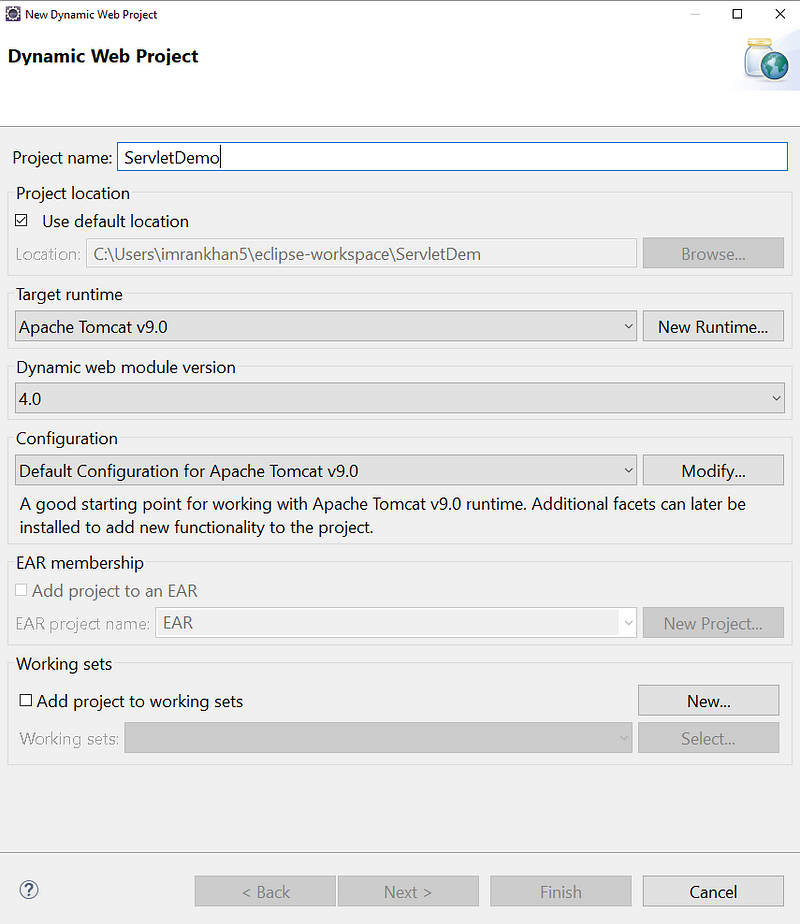
3. Provide the project name and click on finish will help us to create project. On current example we have given as “ServletDemo”.
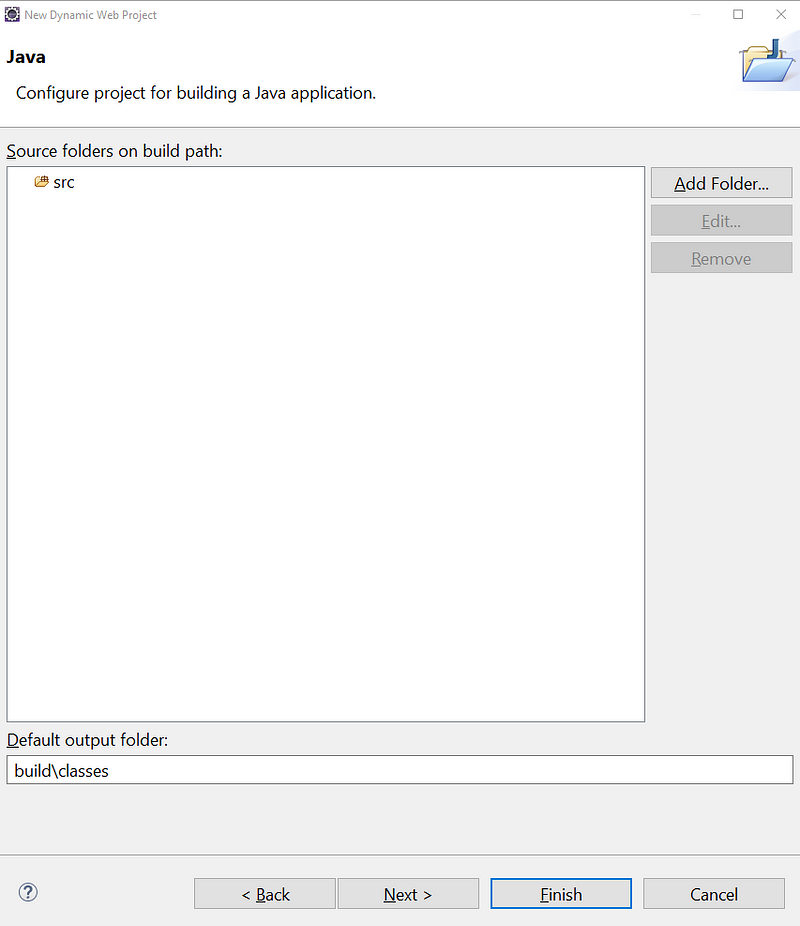
4. Don’t make any change and click on Next.
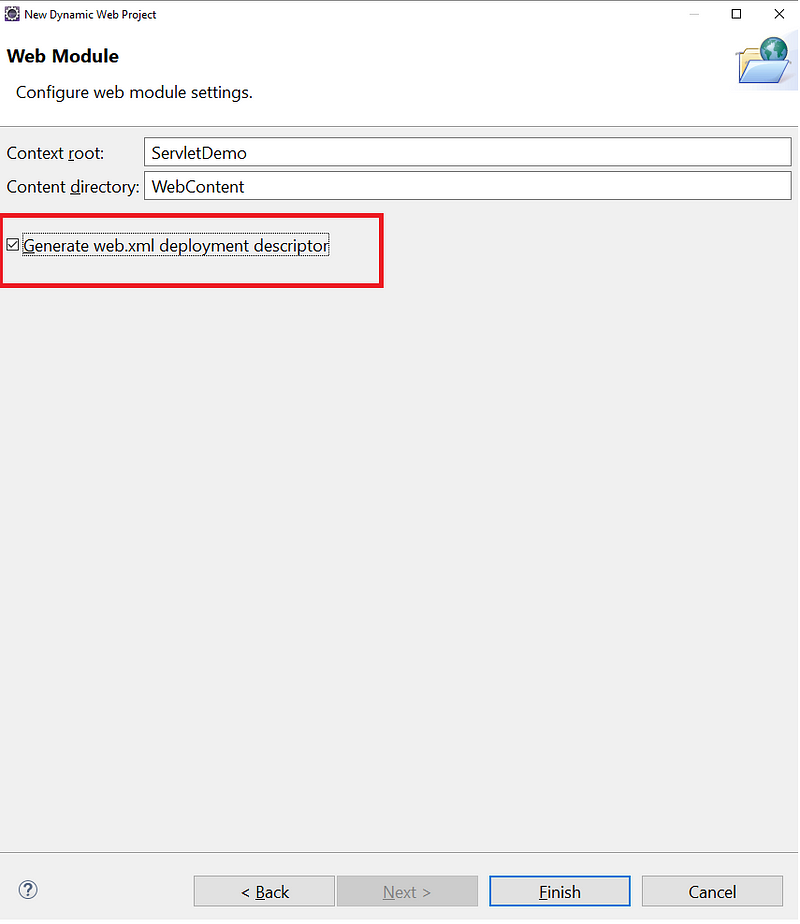
5. Check the checkbox to generate web.xml and click on Finish button will create project.
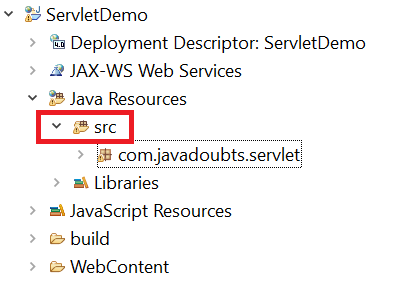
6. Right click on below highlighted folder and create a package having name com.javadoubts.servlet
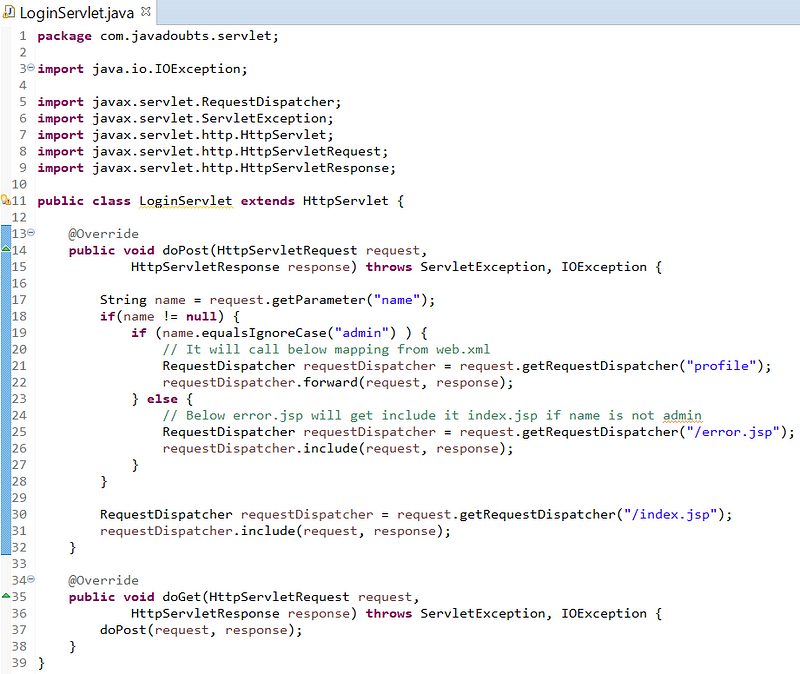
7. Inside package com.javadoubts.servlet, create LoginServlet.java class and type below content.
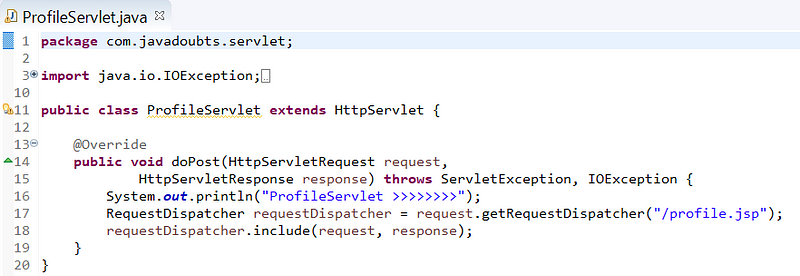
8. Inside same package com.javadoubts.servlet, create ProfileServlet.java class and type below content.
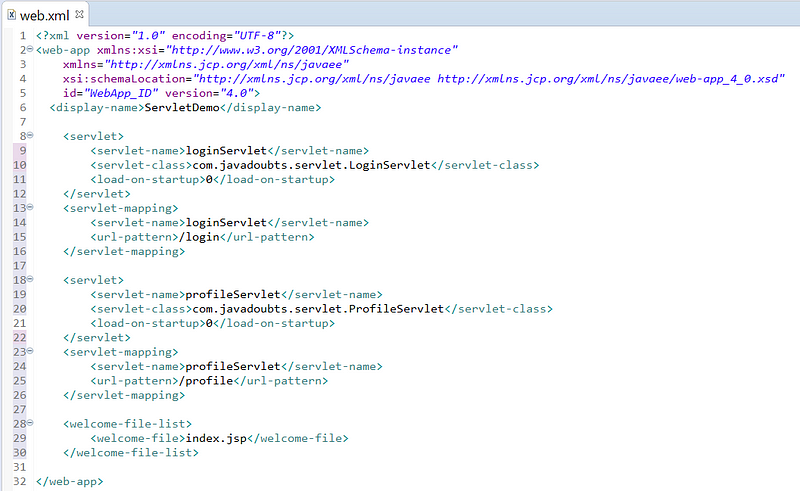
9. Place below content in web.xml file
10. Create below JSP’s files inside WebContent folder as shown below
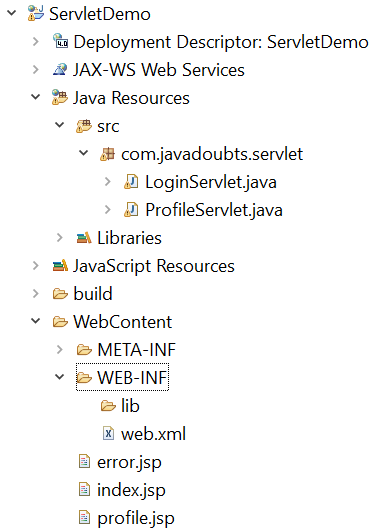
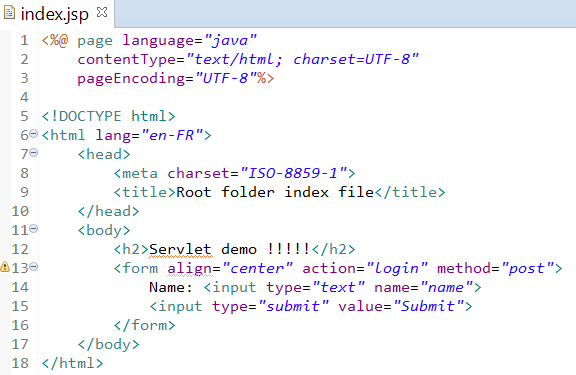
index.jsp
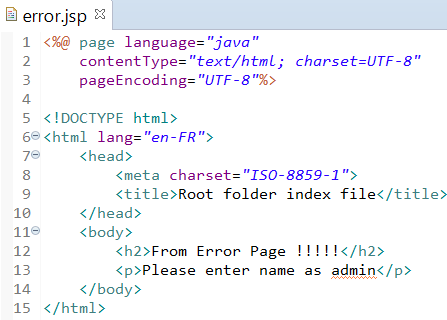
error.jsp
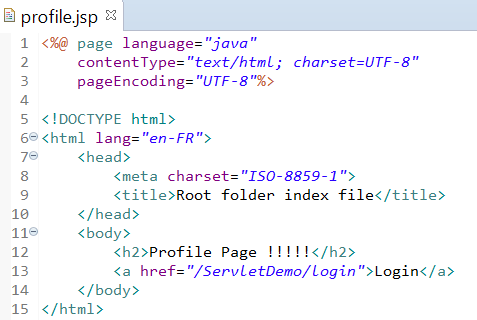
profile.jsp
11. Now, its time to run application.
Right click on the project and select Run As and then Run on Server to run application on Apache Tomcat.
Please follow this link to configure Apache Tomcat in Eclipse.
Below screen will appear as soon as server starts.

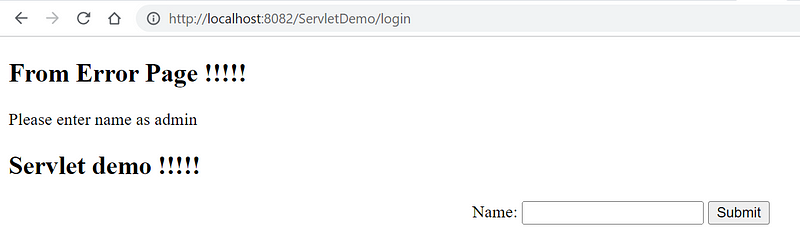
According to below code snippet written in LoginServlet.java class. If we do not enter anything and submit the form will include the error.jsp file into current index.jsp as show below.
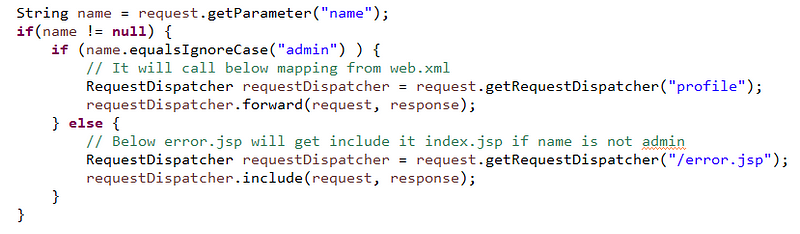
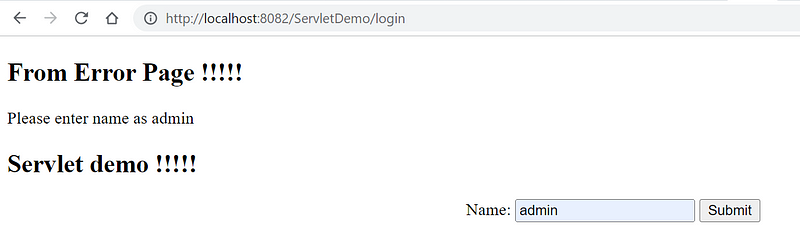
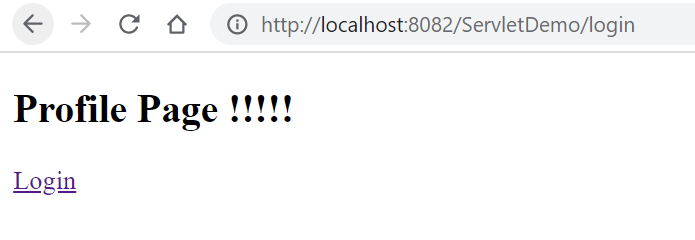
Entering admin as value and submit form will forward request to profile.jsp

Imran Khan
Specialist Master (Architect) with a passion for cutting-edge technologies like AEM (Adobe Experience Manager) and a proven track record of delivering high-quality software solutions.
- Languages: Java, Python
- Frameworks: J2EE, Spring, Struts 2.0, Hibernate
- Web Technologies: React, HTML, CSS
- Analytics: Adobe Analytics
- Tools & Technologies: IntelliJ, JIRA
📝 Blogs
javadoubts.com © All rights reserved