Javadoubts
Hello World Servlet and Apache Tomcat setup complete guide
This tutorial is all about Hello World Servlet and Apache Tomcat setup complete guide. Below are the steps to create basic “Hello World” servlet project using eclipse.
This will also help us to setup Apache tomcat with eclipse.
Same servlet project we can use to add more functionality. e.g. doPost, doDelete, cookie, session, etc.
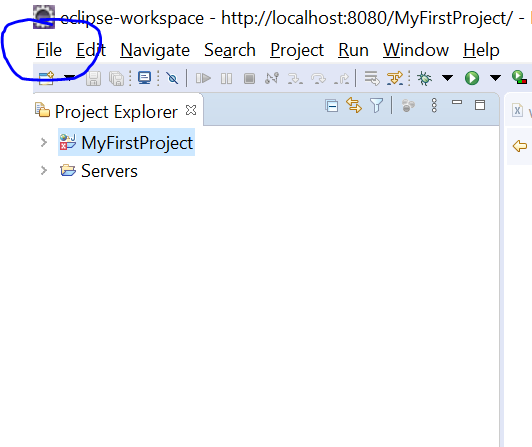
- Open eclipse and Click on File as highlighted below.
File → New → Other
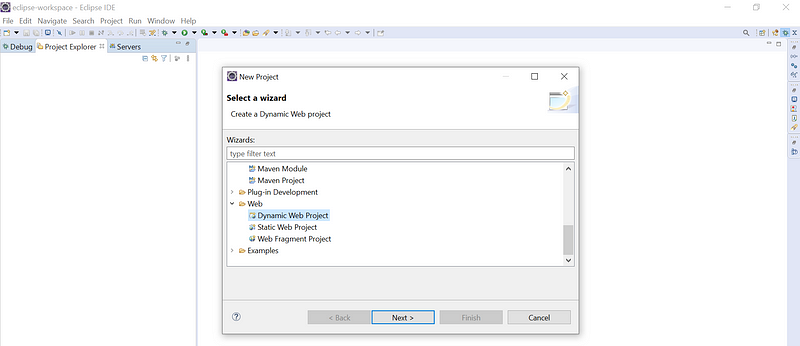
2. Select “Dynamic Web Project” and click on “next” button will help us to create project related to servlet.
3. Provide the project name and click on finish will help us to create project. On current example we have given as “MyFirstProject”.

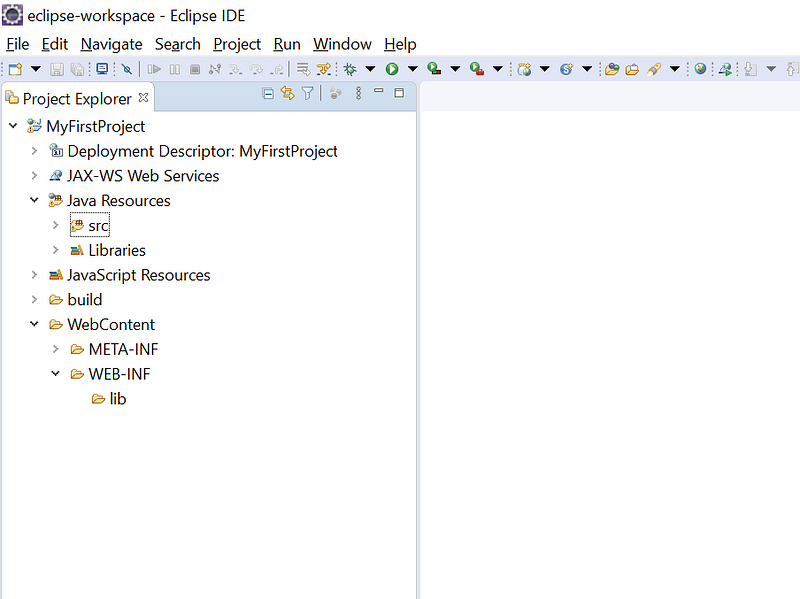
4. After clicking on finish will give below setup ready in eclipse.
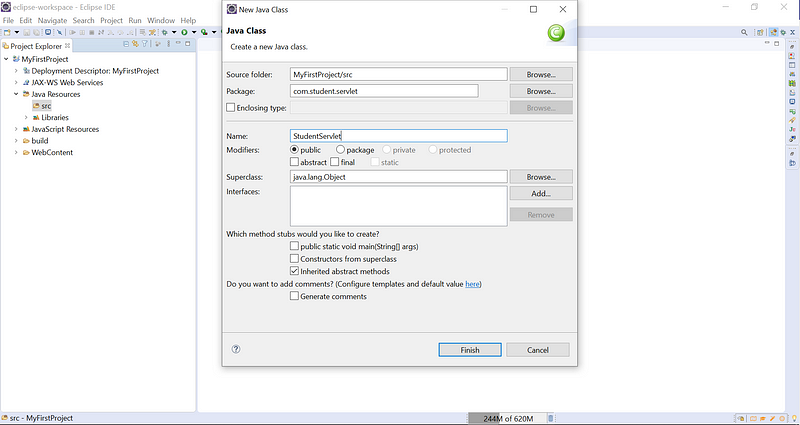
5. Provide the Servlet class name and package name under which class will be lying. In current example we have given package name as “com.student.servlet” and Servlet class name as “StudentServlet”.
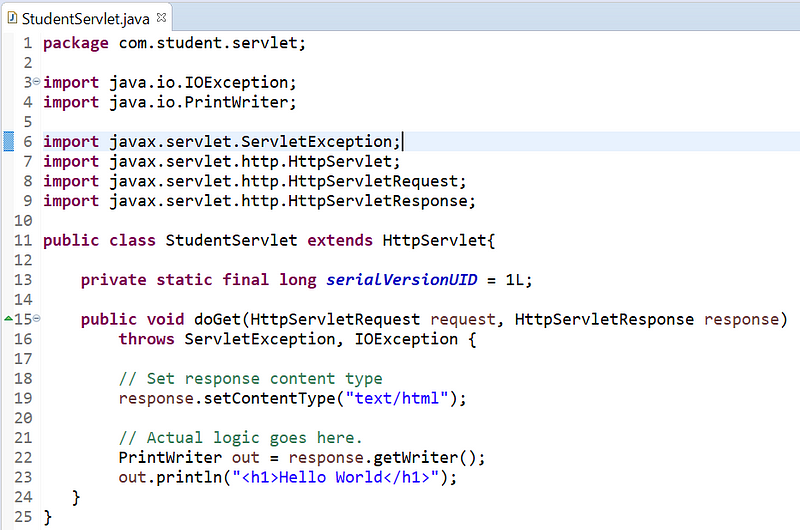
6. Open Student.java in project and add below code.
package com.student.servlet;
import java.io.IOException;
import java.io.PrintWriter;
import javax.servlet.ServletException;
import javax.servlet.http.HttpServlet;
import javax.servlet.http.HttpServletRequest;
import javax.servlet.http.HttpServletResponse;
public class StudentServlet extends HttpServlet{
private static final long serialVersionUID = 1L;
public void doGet(HttpServletRequest request, HttpServletResponse response)
throws ServletException, IOException {
// Set response content type
response.setContentType(“text/html”);
// Actual logic goes here.
PrintWriter out = response.getWriter();
out.println(“<h1>Hello World</h1>”);
}
}
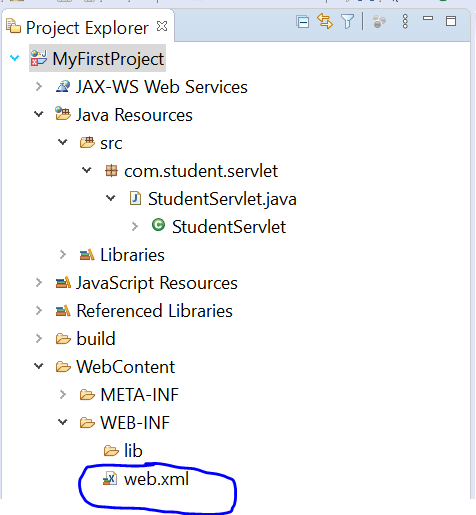
7. Add below web.xml file under WEB-INF folder
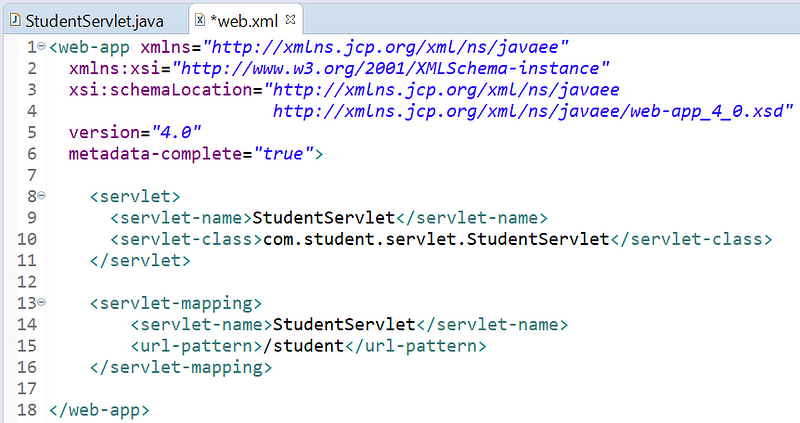
8. Add below content under web.xml file:
<web-app xmlns=”http://xmlns.jcp.org/xml/ns/javaee”
xmlns:xsi=”http://www.w3.org/2001/XMLSchema-instance”
xsi:schemaLocation=”http://xmlns.jcp.org/xml/ns/javaee
http://xmlns.jcp.org/xml/ns/javaee/web-app_4_0.xsd”
version=”4.0″
metadata-complete=”true”>
<servlet>
<servlet-name>StudentServlet</servlet-name>
<servlet-class>com.student.servlet.StudentServlet</servlet-class>
</servlet>
<servlet-mapping>
<servlet-name>StudentServlet</servlet-name>
<url-pattern>/student</url-pattern>
</servlet-mapping>
</web-app>
Apache Tomcat Setup:
To run servlet dynamic web project require a web server. There are different web servers in the market such as Apache Tomcat, Jboss, etc.
To run this application we will be using Apache Tomcat. Please follow below steps to setup apache Tomcat:
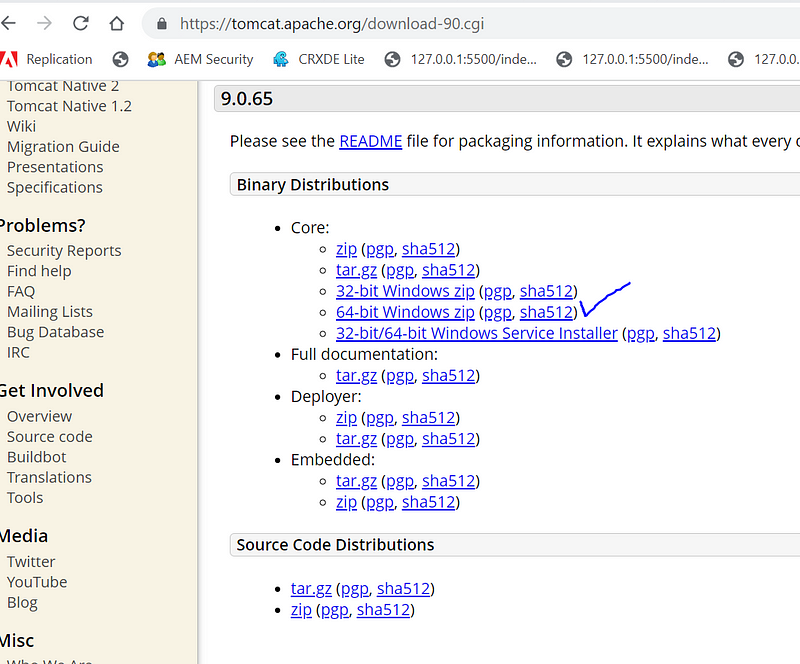
- Download Apache tomcat from this link as show in below screen. We are setting up Apache Tomcat for windows 64bit.
After downloading and unzip the downloaded file in the same folder will give below view.

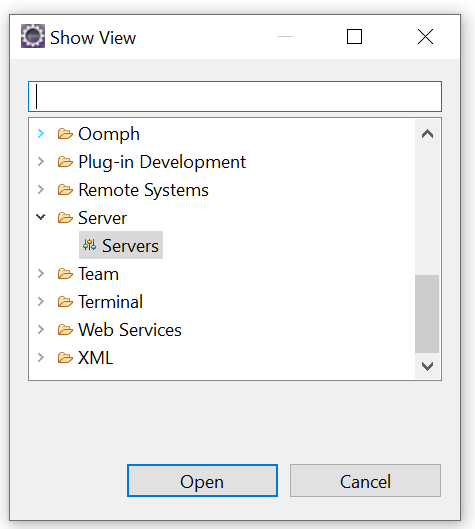
2. Go back to eclipse and click on top menu option “Window” and follow below steps:
Window → Show View → Servers
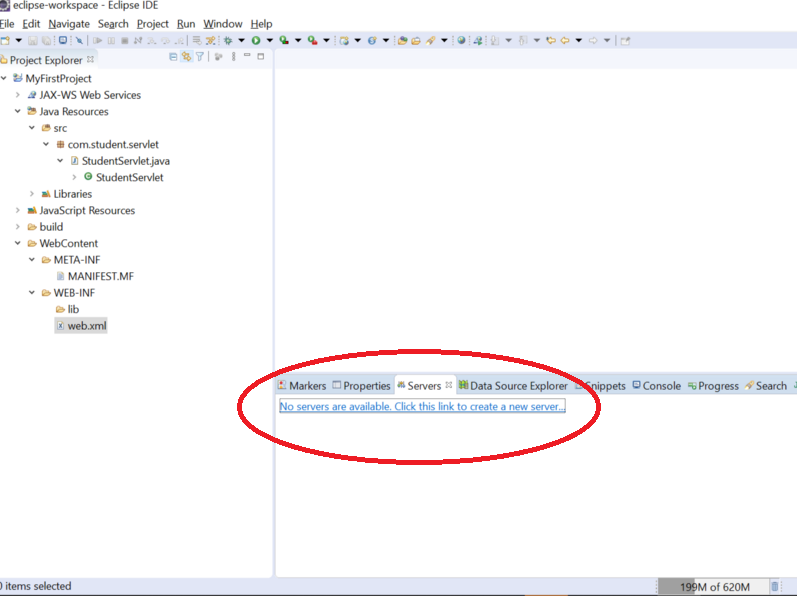
3. It will show below screen with selected tab as “Servers”. Select anchor link highlighted red in color.
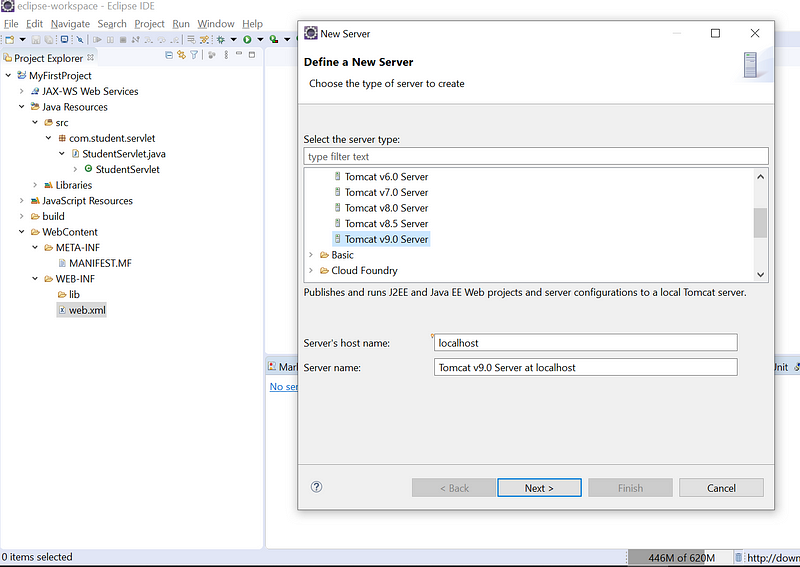
4. Select Downloaded Tomcat Version. In our case it will be “Tomcat v9.0 Server” and click on “next” button.
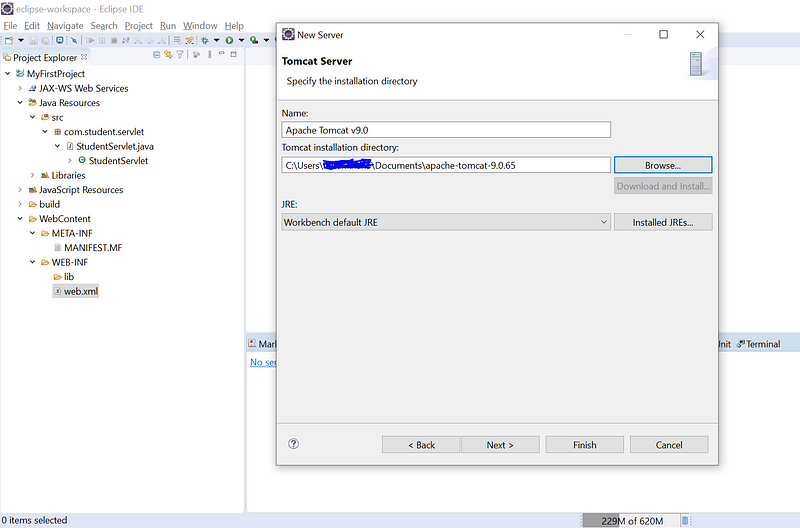
5. Click on browse button and select unzip downloaded Apache Tomcat folder as mentioned in below screen.
Click on Finish will complete the setup.
Now, its time to deploy our code base on Apache Tomcat as both our Servlet code base and Apache Tomcat is ready.
Deploy Servlet Project on Apache Tomcat
To deploy Servlet “Dynamic Web Project” follow below steps:
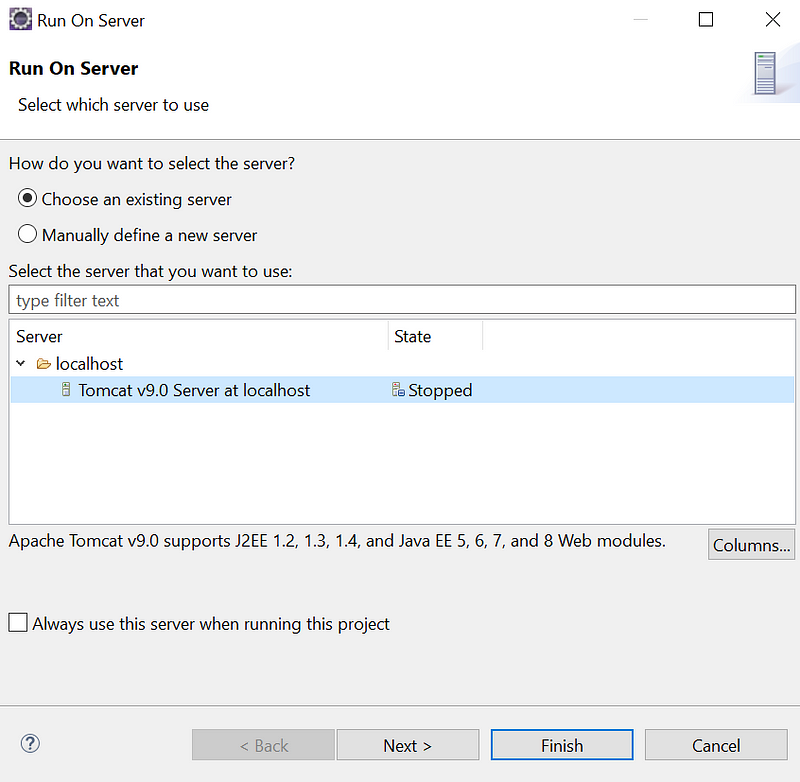
- On the top menu in eclipse tool select run → Run on Server
Select Tomcat as shown in below screen and click on Finish, wait for 1 min for server to get start.
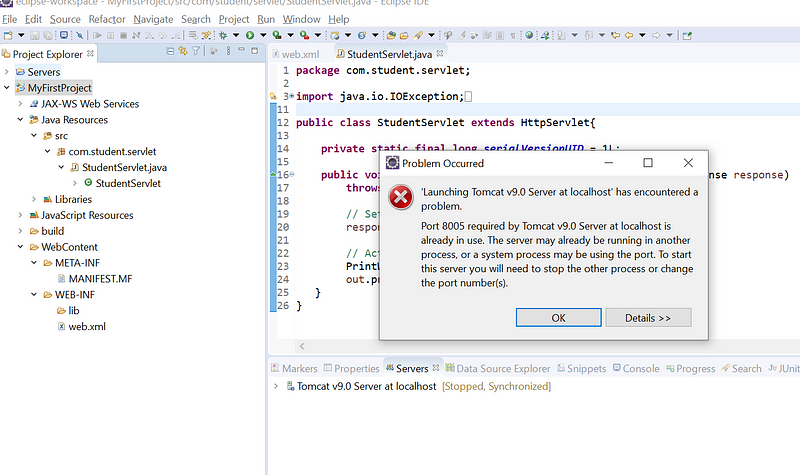
NOTE: We can face below issue as soon as we start Apache Tomcat server start. This issue occurs if the port is in use by some other application.
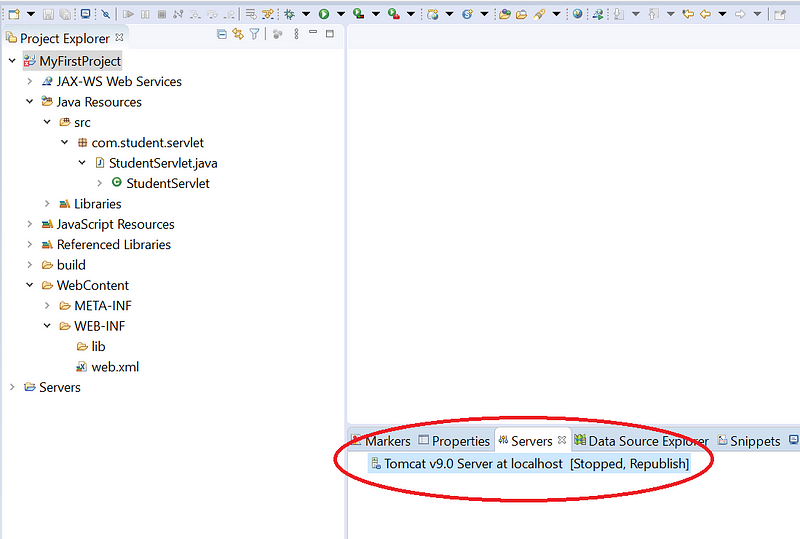
To resolve this issue please double click on below link highlighted in red in color.
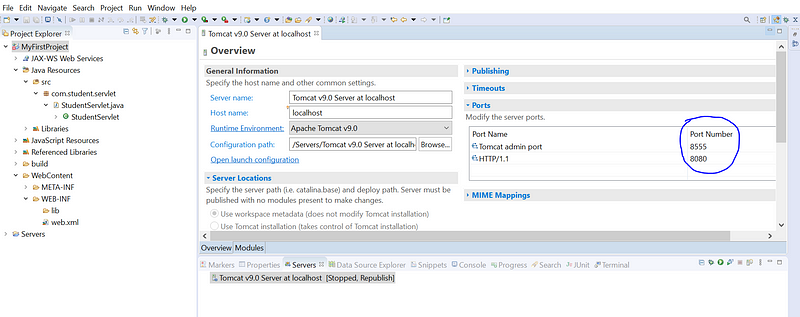
Update the port to any four digit number which is not in use and click on save.
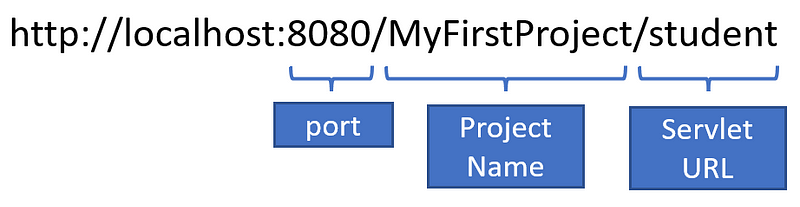
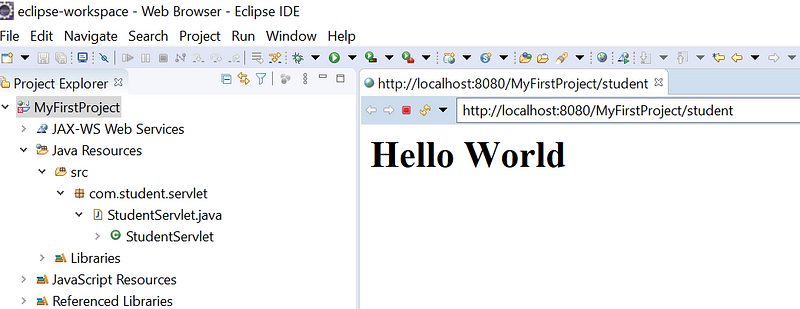
Please follow 1st step under “Deploy Servlet Project on Apache Tomcat” and redeploy the code and hit below URL to see result:
http://localhost:8080/MyFirstProject/student
OUTPUT:

Imran Khan
Specialist Master (Architect) with a passion for cutting-edge technologies like AEM (Adobe Experience Manager) and a proven track record of delivering high-quality software solutions.
- Languages: Java, Python
- Frameworks: J2EE, Spring, Struts 2.0, Hibernate
- Web Technologies: React, HTML, CSS
- Analytics: Adobe Analytics
- Tools & Technologies: IntelliJ, JIRA
📝 Blogs
javadoubts.com © All rights reserved