Basic Project Setup
This blog will help you to create a basic Hibernate project within 10 min and insert data in MySQL database.
This will give you an overall idea on how hibernate works and save data to database. It will also help you to answer most of the practical interview questions.
As part of this discussion, we will be creating sample Hibernate program to insert data in MySQL database.
Pre requisite before starting hibernate development is to have Java, MySQL and Eclipse installed in local.
Below Example will help to create Hibernate project using Eclipse to insert data in MySQL database.
- Let’s create a maven project using Eclipse.
Click on File in top navigation and select New and than click on maven Project.
File → New → Maven Project
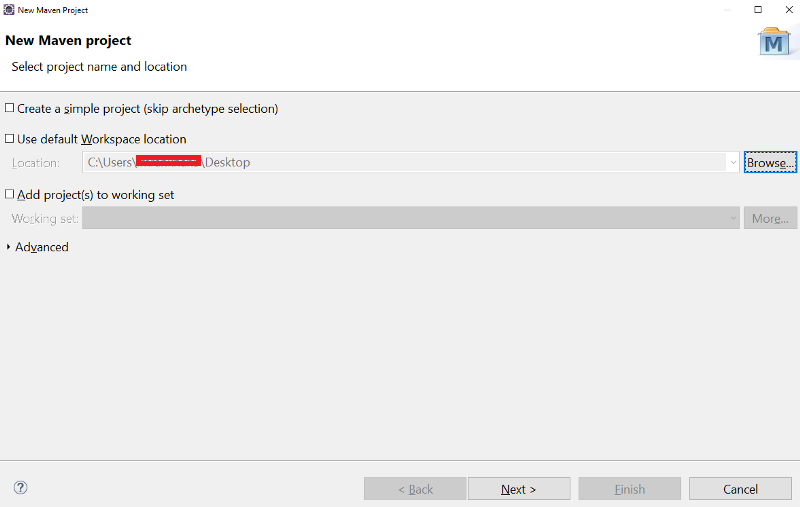
Below window will appear, no changes are required and click on Next
2. Wait for sometime or archetype to get appear on screen. Select below highlighted archetype Artifact Id as maven-archetype.quickstart and Group Id as org.apache.maven.archetypes.
click on Next after below inline selection.

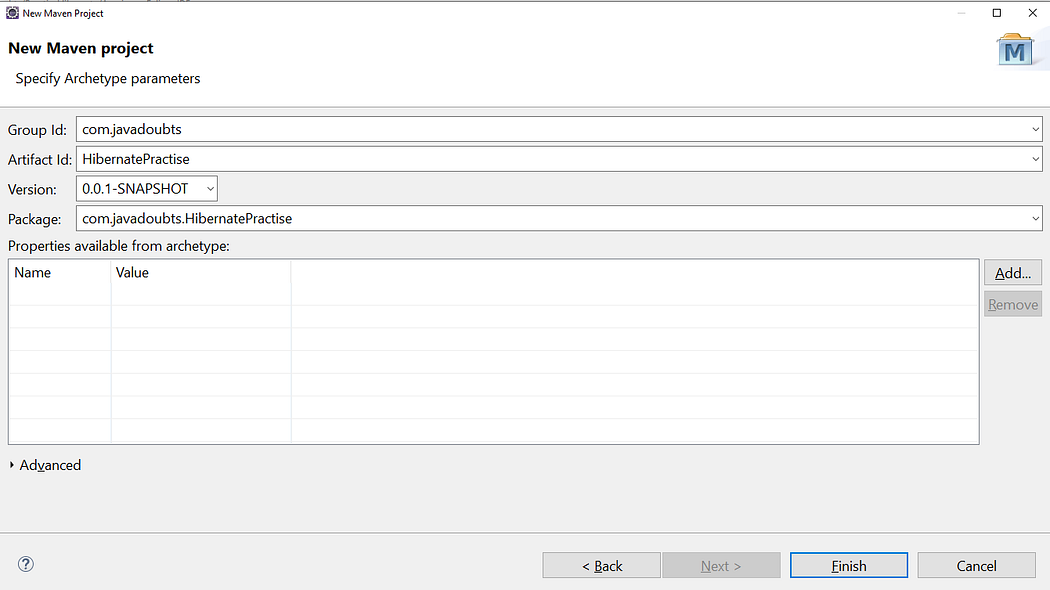
3. provide the Group Id and Artifact Id as mentioned below. Click on Next.
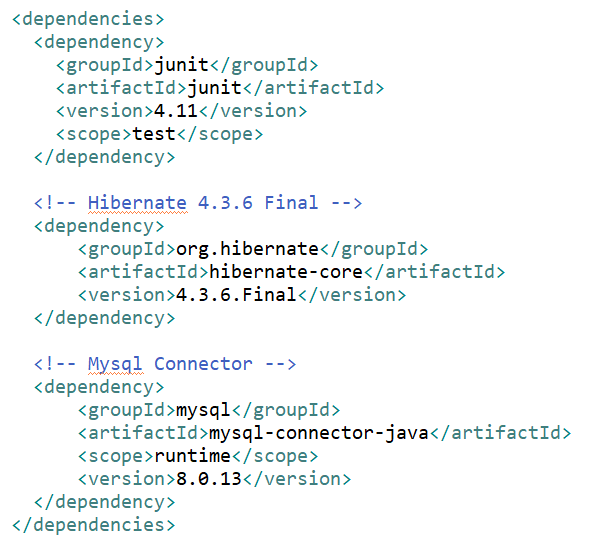
4. Copy paste below dependencies for hibernate and mysql under dependencies section in pom.xml.
5. Create a User.java inside com.javadoubts.PractiseHibernate package which will be persistence object to save data in database.

6. Create resource folder under below highlighted hierarchy.
Very important Step:
right click select Build Path option and than select Use as Source Folder.

7. Create user.hbm.xml file to provide mapping of User class and usr MySQL table as shown below at liner number 6.
Create mapping for class variables and table columns.
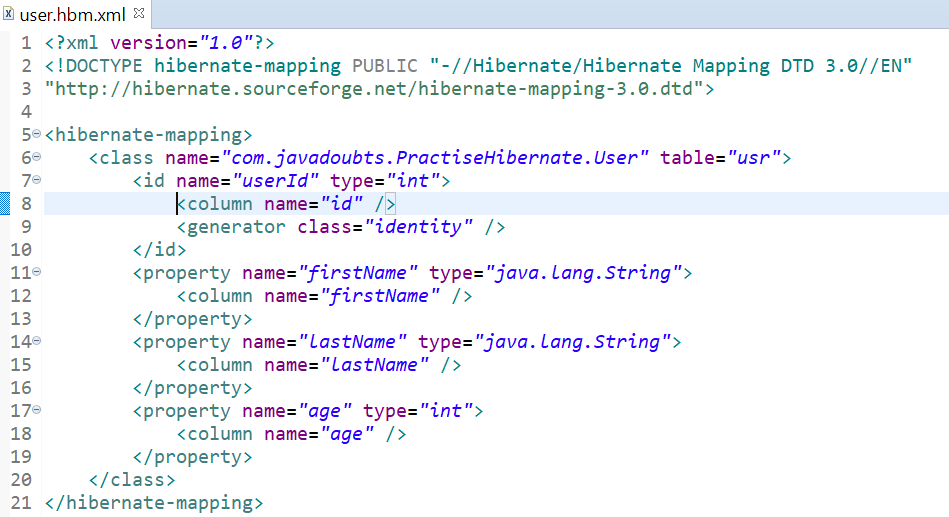
<hibernate-mapping> contains all bean class mappings.
<class> create mapping in between class and table. name attribute value represents to class name and table attribute value represents to MySQL table name.
<property> represents to class declare class level variable. name attribute value represents to class level variable and type represents to data type of that variable.
<column> represents to column MySQL table. name attribute value represents to column name.
<id> represents to unique ID attribute in class map to the primary key of the database table.
<generator> this helps to generate unique id for given column.
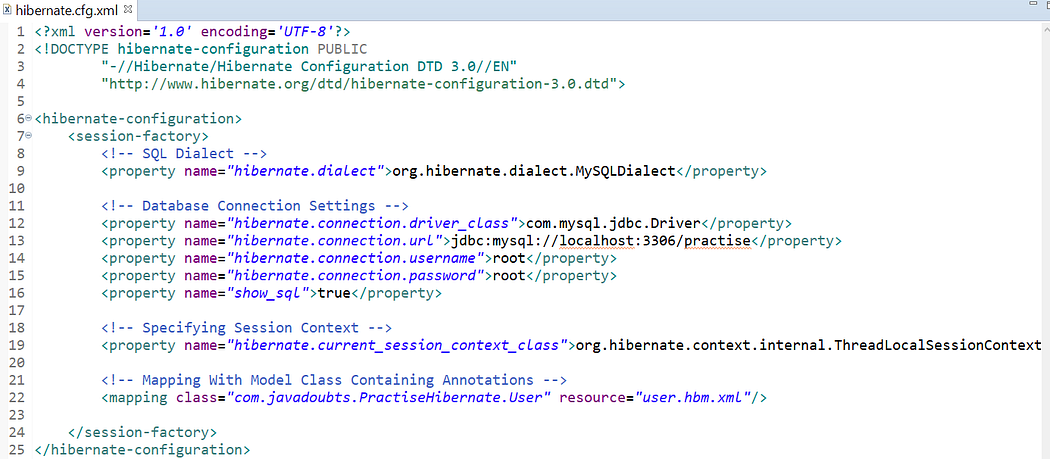
8. Create hiernate.cfg.xml file to provide info related to database connection as mentioned below.
Load user.hbm.xml file using mapping tag as mentioned at line number 22.
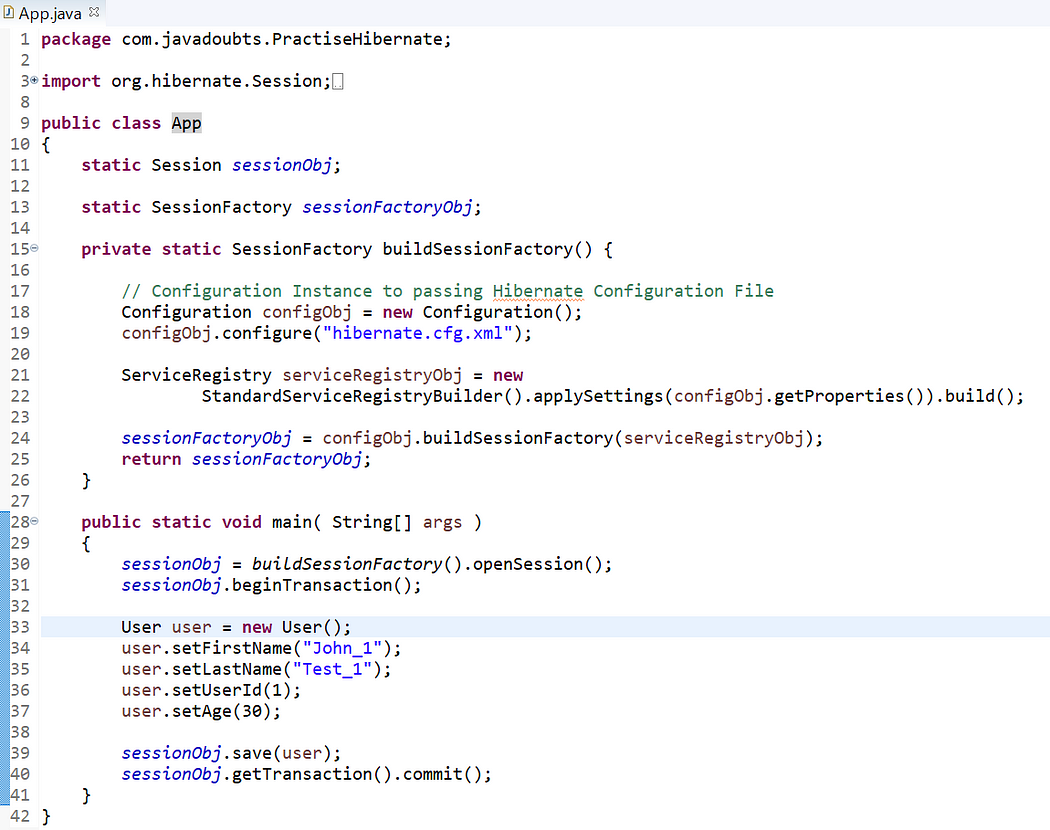
9. Copy paste below code to App.java class. This class will help to load Hibernate configuration and Hibernate config with load User hbm file where we have written User class variable and column mapping.
In below code, we have saved user data with the help of bean class without using SQL query.
10. Create a table usr in MySQL using below query.
create table usr(userId int NOT NULL AUTO_INCREMENT, firstName varchar(20), lastName varchar(20), age int, primary key(userid));
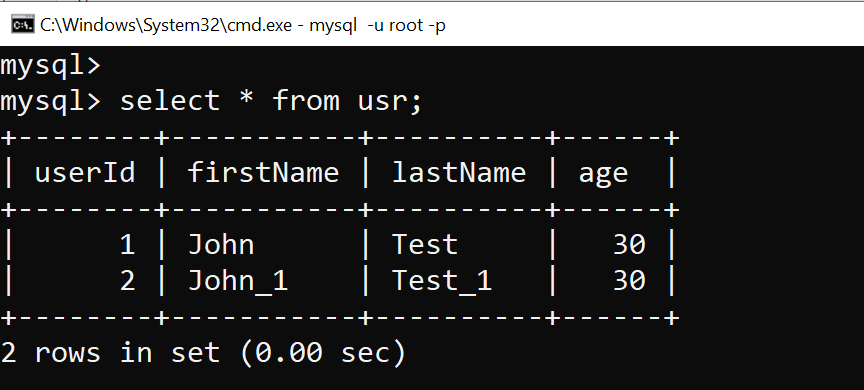
11. Run App.java main function as Java application will insert the data in the database as shown below.
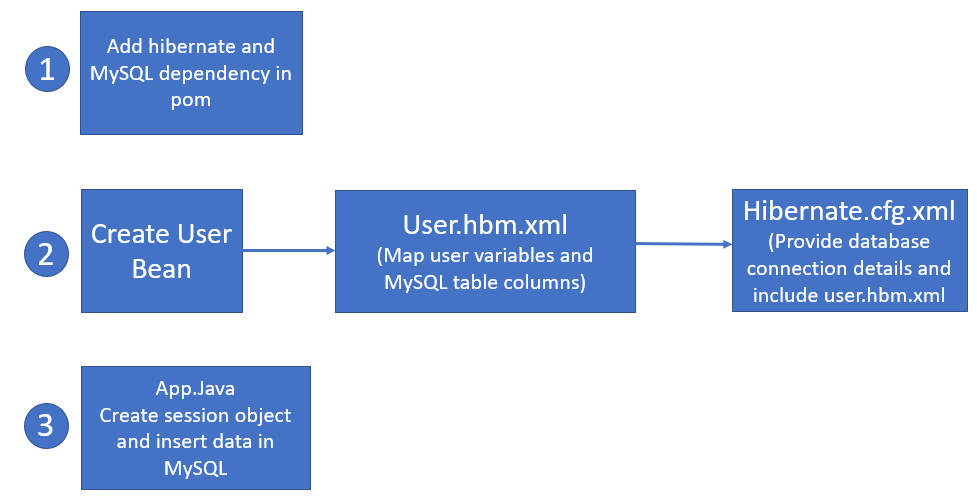
Cheat Sheet
Below is the quick walk though of the steps we performed above to insert data in database.

Imran Khan, Adobe Community Advisor, certified AEM developer and Java Geek, is an experienced AEM developer with over 12 years of expertise in designing and implementing robust web applications. He leverages Adobe Experience Manager, Analytics, and Target to create dynamic digital experiences. Imran possesses extensive expertise in J2EE, Sightly, Struts 2.0, Spring, Hibernate, JPA, React, HTML, jQuery, and JavaScript.