Javadoubts
Spring Dependency Injection and IoC
This tutorial will help you to understand the concepts of Spring dependency injection and IoC (inversion of control). On top of that, it will also help you to create a sample Spring application with Java installation.
This blog will also explains dependency injection in detail.
Dependency injection is also called as DI and it is a kind of design pattern that makes code loosely coupled and easy to manage.
In Spring framework, dependency injection can be achieved using below methods:
1. constructor
2. Getter and Setter bean class methods
There are multiple ways to create an instance of class:
Using new keyword
Person person = new Person();
Using static method of that class
public static Person getPersonInstance() {
person = new Person();
}
Person person = Person.getPersonInstance();
There is an issue with above instance creation as mentioned below:
Tight coupling: Above instance creation approach will be tightly coupled. To change a instance type will require a lot of changes in core files and testing. On top of that, it will require a complete code deployment.
Inversion of Control
Whenever we talk about dependency injection, there is one more topic that comes up for discussion, which is Inversion of Control (IoC).
IoC container uses dependency injection and inversion of control which helps us to instantiates, configures, and assembles beans or pojo classes by reading XML configurations, Java annotations, and/or Java code in the configuration files.
IoC is achieved through DI .Inversion of Control is a type of prototype that Dependency Injection operates on.This actually inverts control or changes the way we do things.
Previously, we used to create an instance of a class using the new keyword, and to make a change in the reference, we required a complete build. We can create an instance of a class in the SpringConfig.xml file using dependency injection without adding a new keyword or changing the Java file. Making a change will also not require a build or code change, as it will be just a config change. The way we are creating an instance is called Inversion of Control, where we invert or transfer the control or responsibility.
The container is all about xml file which instantiate application classes and manage the dependency in between therse objects.
To achieve loose coupling and less dependency we ust dependency injection. IoC container is respnsible for managing dependencies in between objects using DI.
Spring provides two types of containers:
BeanFactoryContainer
BeanfactoryContainer class is an implementation of org.springframework.beans.factory.BeanFactory interface.
Below is the code snippet to create BeanFactory instance:
Resource resource=new ClassPathResource(“applicationContext.xml”);
BeanFactory factory=new XmlBeanFactory(resource);
ApplicationContext Container
ApplicationContext is the child interface of BeanFactory interface.
ClassPathXmlApplicationContext class is an implementation of org.springframework.context.ApplicationContext interface.
Below is the code snippet to create BeanFactory instance:
ApplicationContext context =
new ClassPathXmlApplicationContext(“applicationContext.xml”);
Note:
It is always suggested to use ApplicationContext as it is a child of the BeanFactory interface and has more rich extra features. It provides support for i18n, annotation-based dependency injection, and integration with AOP without writing extra code. If the project requires little memory, use BeanFactory.
Note:
If you require a help to setup and create Spring project in local. Please follow link which will help you to create Spring project within 5 min with custom output.
Dependency Injection using Constructor
As mentioned above, dependency injection can be achieved using constructor and setter method.
Let’s follow below steps to achieve dependency injection using constructor:
1. Create sample Spring project and create Person.java file.

2. Create SpringConfig.xml file in parallel to com.example.demo package which will help us to create bean class instance.
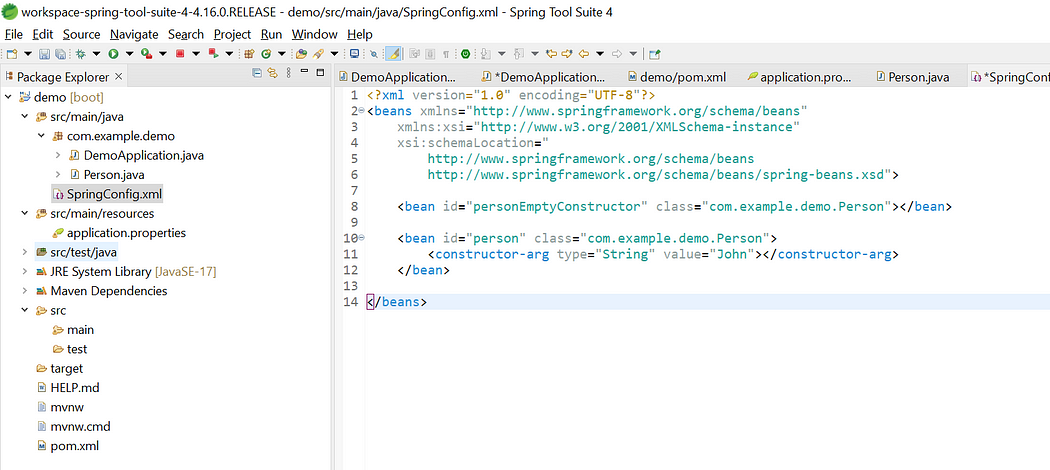
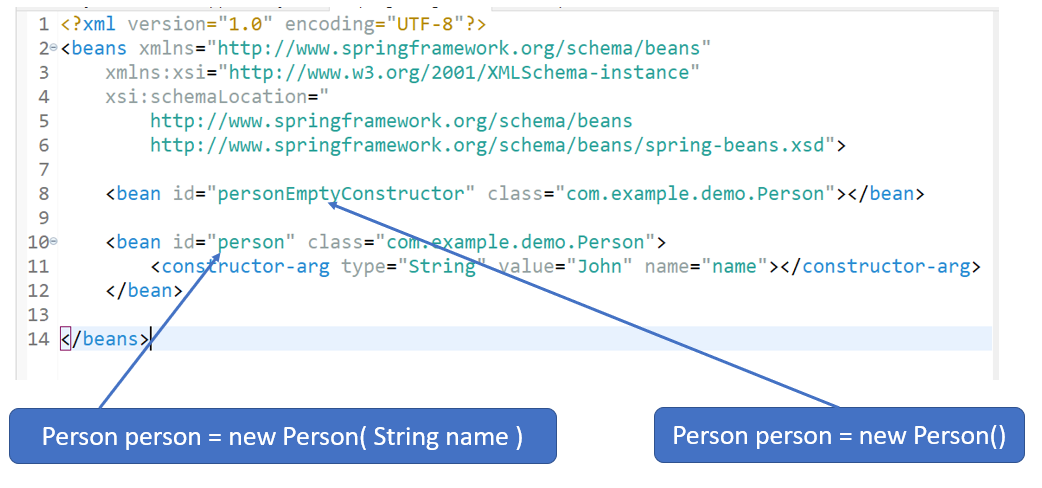
Note: In below code snippet, line number 8 helps us to create an instance of Person class with default constructor and line number 10 help us to create an instance of same Person class using parameterized constructor.
Creation of instance using SpringConfig.xml file helps us to achieve loose coupling.
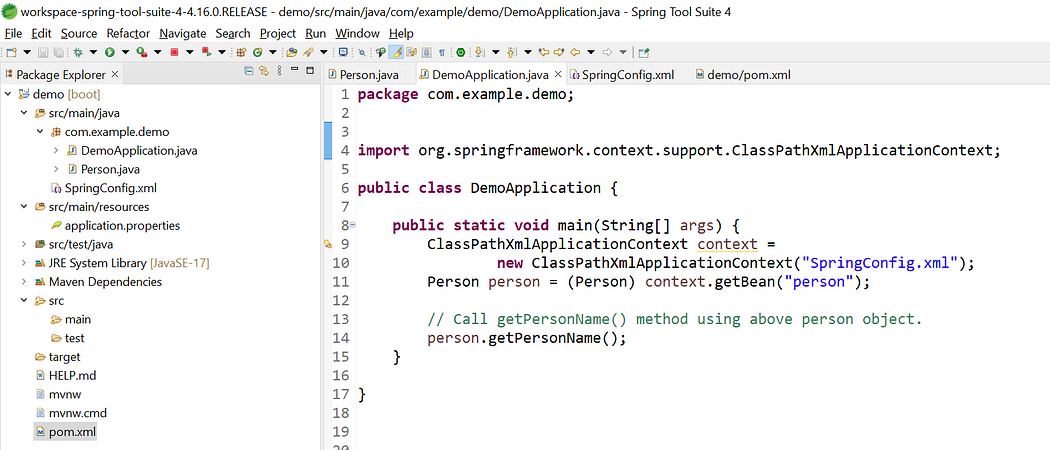
3. Create public Java class with main method to class Person bean class object.
Line number 9 ClassPathXmlApplicationContext will load and it will load all beans defined in SpringConfig.xml as mentioned in above steps.
At line number 11 create a instance of Person class using context instance as pass “person” as a parameter defined in SpringConfig.xml
Line number 14 will call getPersonName() method defined in Person class using instance created at line number 11.
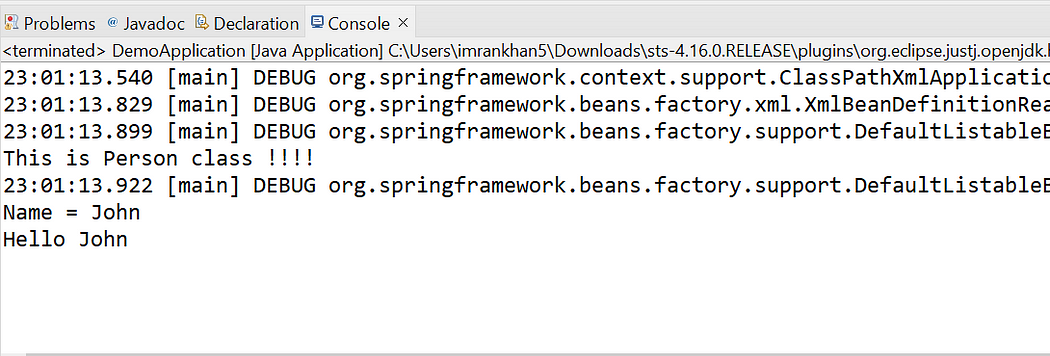
OUTPUT:
Dependency Injection using Setter method
Let’s follow below steps to achieve dependency injection using setter method.
Setter method helps us to create an instance of a class and assign same instance variable to different class.
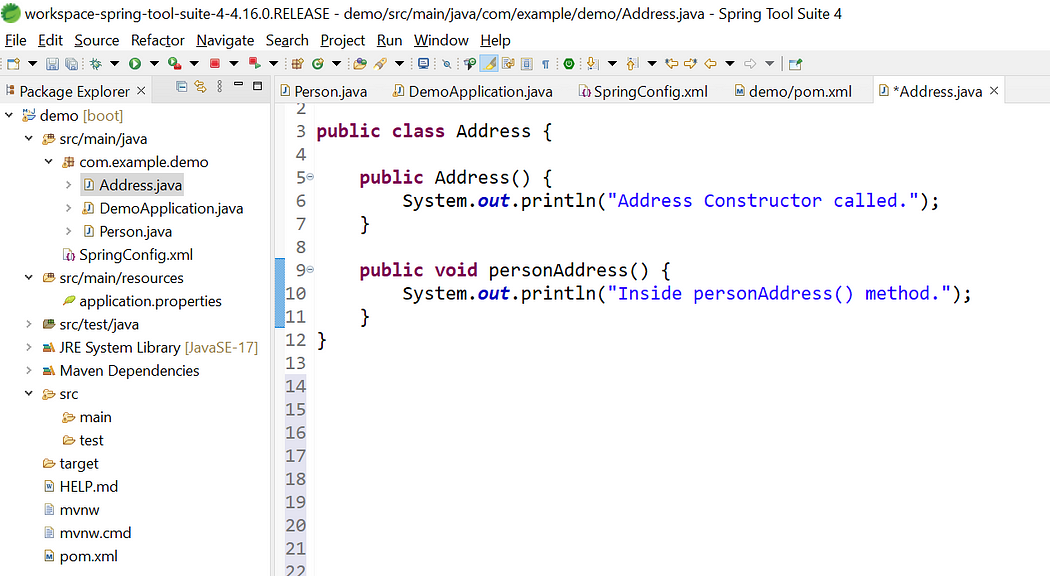
Step1: Lets create new Spring project and Address.java class with below content.
Below Address class contains a constructor and public method.
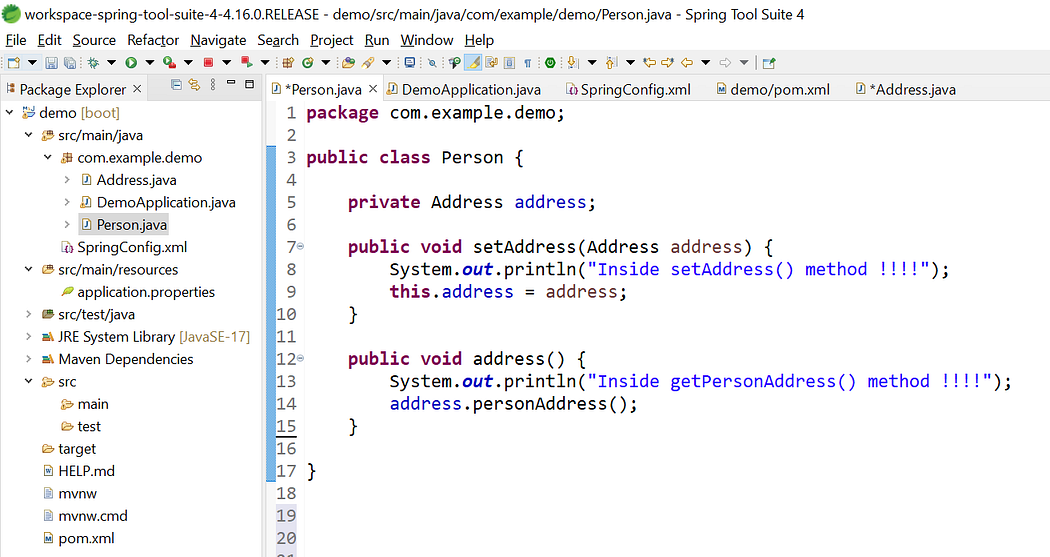
Step2: Create a Person class having one Address variable with setAddress() method.
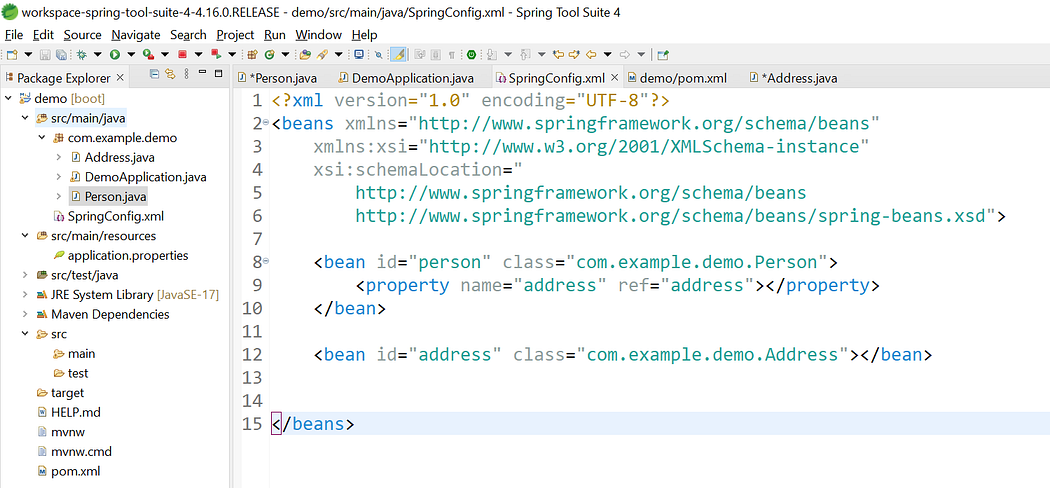
Step3: Create SpringConfig.xml file and paste/write below code from line number 8 to 12. Line number 8 and 12 will help us to create Person and Address class instance.
Below line number 9 in SpringConfig.xml will call setAddress() method form Person class to set a value of address variable which got create at line number 12.
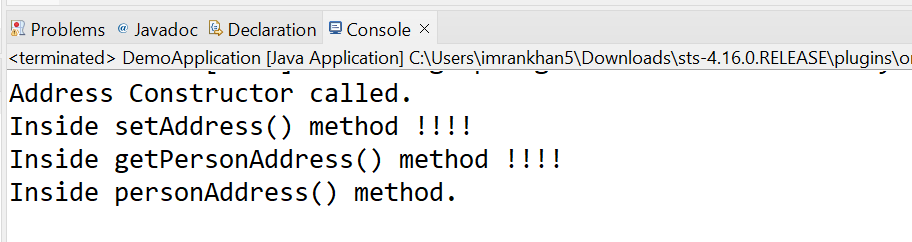
OUTPUT:

Imran Khan
Specialist Master (Architect) with a passion for cutting-edge technologies like AEM (Adobe Experience Manager) and a proven track record of delivering high-quality software solutions.
- Languages: Java, Python
- Frameworks: J2EE, Spring, Struts 2.0, Hibernate
- Web Technologies: React, HTML, CSS
- Analytics: Adobe Analytics
- Tools & Technologies: IntelliJ, JIRA
📝 Blogs
javadoubts.com © All rights reserved