AEM Component Creation
AEM component is a block of code or a specific functionality to showcase on the web page.
e.g. -> On page we can have number of components such as header, footer, hero , side navigation, table, button, etc.
As part of this blog we will be creating custom profile component which will help us to render full name, age, gender and address. As part of this blog we will get to the file we are going to add as part of profile component creation.

We are going to create below highlighted component hierarchy as part of current implementation:
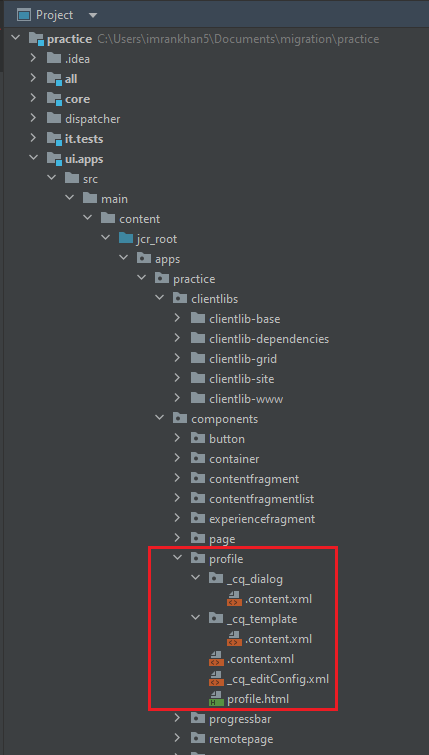
Please follow below steps to create a component in AEM:
- Navigate to project specific component folder such as ui.apps/src/main/content/jcr_root/apps/practice/components folder and create a custom component folder. In our case or for current tutorial it is profile.
2. Create .content.xml file inside profile folder created in first step and paste below content:
<?xml version="1.0" encoding="UTF-8"?>
<jcr:root xmlns:sling="http://sling.apache.org/jcr/sling/1.0"
  xmlns:cq="http://www.day.com/jcr/cq/1.0"
  xmlns:jcr="http://www.jcp.org/jcr/1.0"
    jcr:primaryType="cq:Component"
    jcr:title="Profile"
    componentGroup="Practice"/>
jcr:primaryType is to create a node of type cq:component as it is going to a component.
jcr:title is to declare component title.
componentGroup is use to group component under one category.
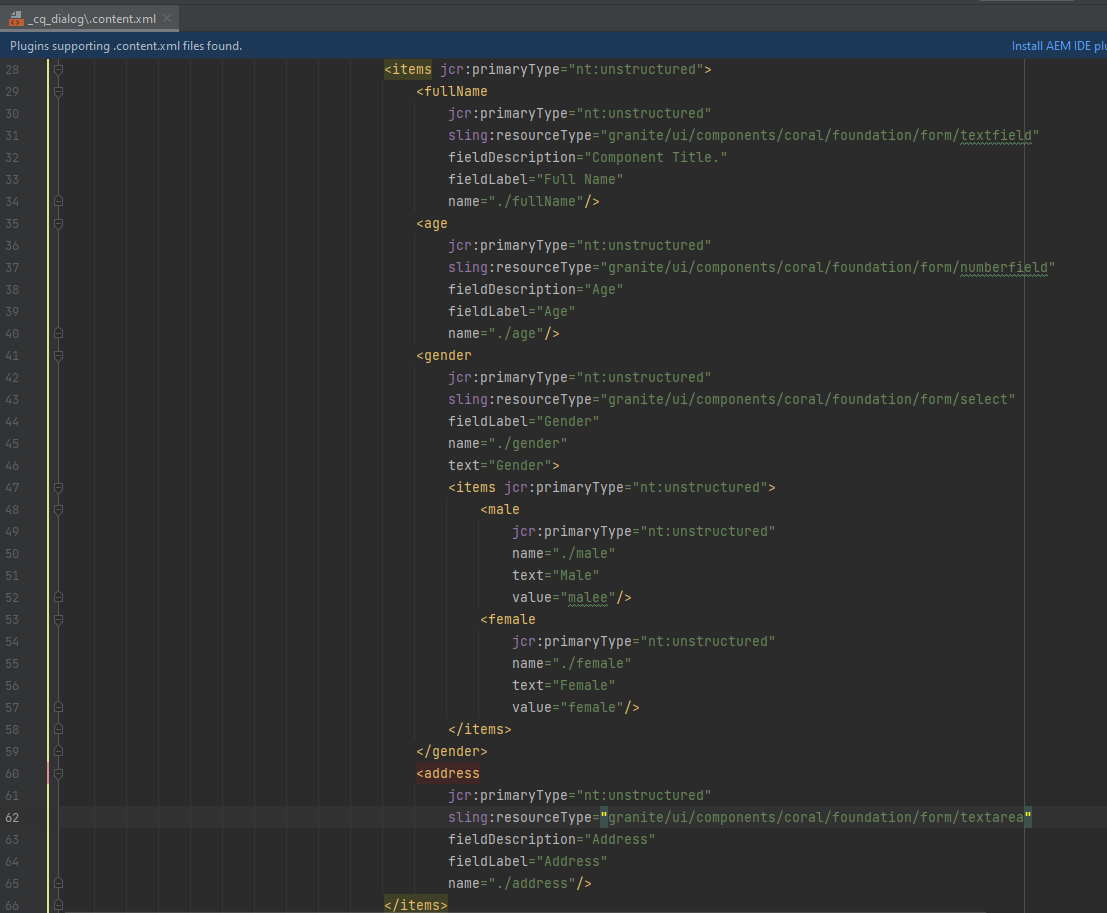
3. Create _cq_dialog folder inside profile folder created in first step. Create .content.xml file inside _cq_dialog folder and paste below component.
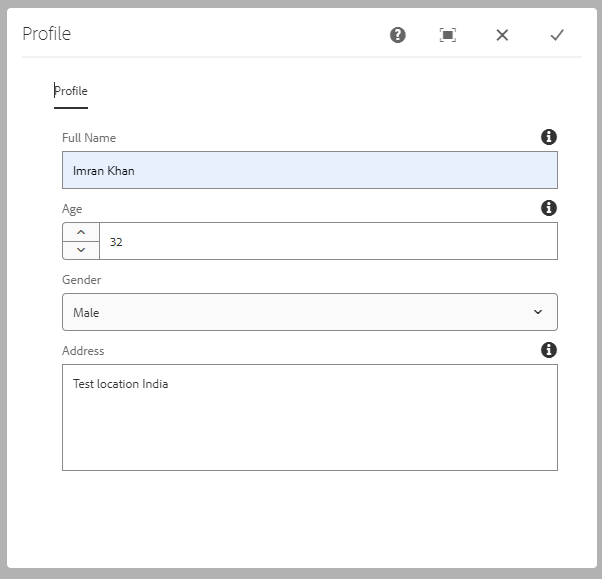
In below inline file provided 4 authorable fields to author Full Name, Age, Gender and Address with the help of various field types like text field, dropdown, age.
Create _cq_template folder inside profile folder created in first step. Create .content.xml file inside _cq_template folder and paste below content.
Below code will allow us to set default values to component as soon as we drag and drop component over page.
<?xml version="1.0" encoding="UTF-8"?>
<jcr:root
  xmlns:jcr="http://www.jcp.org/jcr/1.0"
   xmlns:nt="http://www.jcp.org/jcr/nt/1.0"
   jcr:primaryType="nt:unstructured"
    fullName="Test Name"
    age="21"
    gender="female"
    address="Juhu Mumbail">
</jcr:root>
4. Create profile.html file having same name we have given to folder as profile.
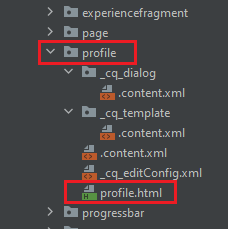
Access current component or node properties with the help of out of the box properties object.
<sly data-sly-use.placeholderTemplate="core/wcm/components/commons/v1/templates.html">
    <div>Full Name: ${properties.fullName} </div>
    <div>Age: ${properties.age} </div>
    <div>Gender: ${properties.gender} </div>
    <div>Address: ${properties.address} </div>
</sly>

<sly data-sly-call="${placeholderTemplate.placeholder @ isEmpty=!hasContent}"></sly>
5. Create _cq_editConfig.xml file to declare or allow actions(allow to edit, copy, move, delete, etc.) and listeners to enhance component experience.
<?xml version="1.0" encoding="UTF-8"?>
<jcr:root xmlns:cq="http://www.day.com/jcr/cq/1.0" xmlns:jcr="http://www.jcp.org/jcr/1.0" xmlns:nt="http://www.jcp.org/jcr/nt/1.0"
  cq:actions="[DELETE,INSERT,COPYMOVE,EDITANNOTATE]"
  jcr:primaryType="cq:EditConfig"
  cq:disableTargeting="{Boolean}true">
    <cq:listeners
        jcr:primaryType="nt:unstructured"
        afterchildinsert="REFRESH_SELF"
        afterdelete="REFRESH_SELF"
        afteredit="REFRESH_SELF"
        afterinsert="REFRESH_SELF"/>
</jcr:root>
cq:disableTargeting is to disable targeting for profile component.
cq:dialogMode as floating to show dialog on top of the component and can be move around.
Listeners
cq:listeners tag allows us to refresh component, page or parent component after authoring as soon as we click on ok.
Below are out of the box listeners
REFRESH_SELF listener will refresh current component after edit, delete, inserted, etc.
REFRESH_PARENT listener will refresh parent component after edit, delete, inserted, etc.
REFRESH_PAGE listener will refresh current page after edit, delete, inserted, etc.
REFRESH_INSERTED listener will refresh current component as soon as insert in page.
5. Go to project root folder and run below command to deploy code on AEM instance:
mvn clean install -PautoInstallPackage -DskipTests=true
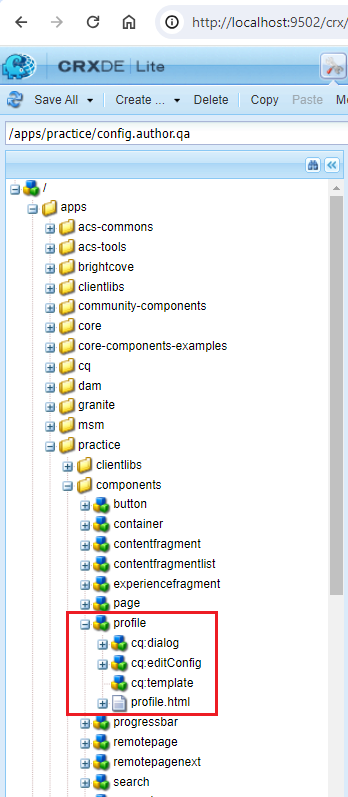
6. Verify below highlighted structure after build in crx de http://localhost:4502/crx/de/index.jsp:
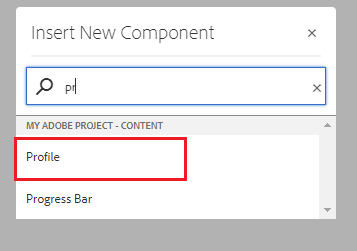
7. Create page, drag and drop profile component on the page. Click on Drag components here option as shown below:

8. Select Profile component option as highlighted below:

9. Select profile component and click on below highlighted button to author profilecomponent

10. Author profile component, fill title and description. Click on ok button highlighted red in color.
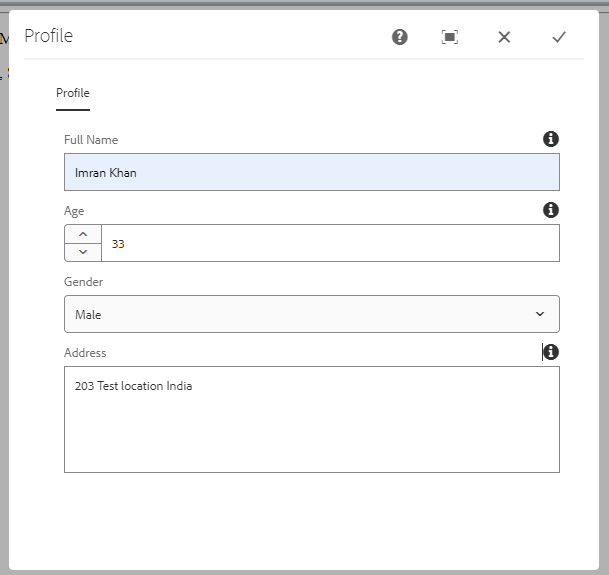
11. Below is the output for Profile component after authoring.

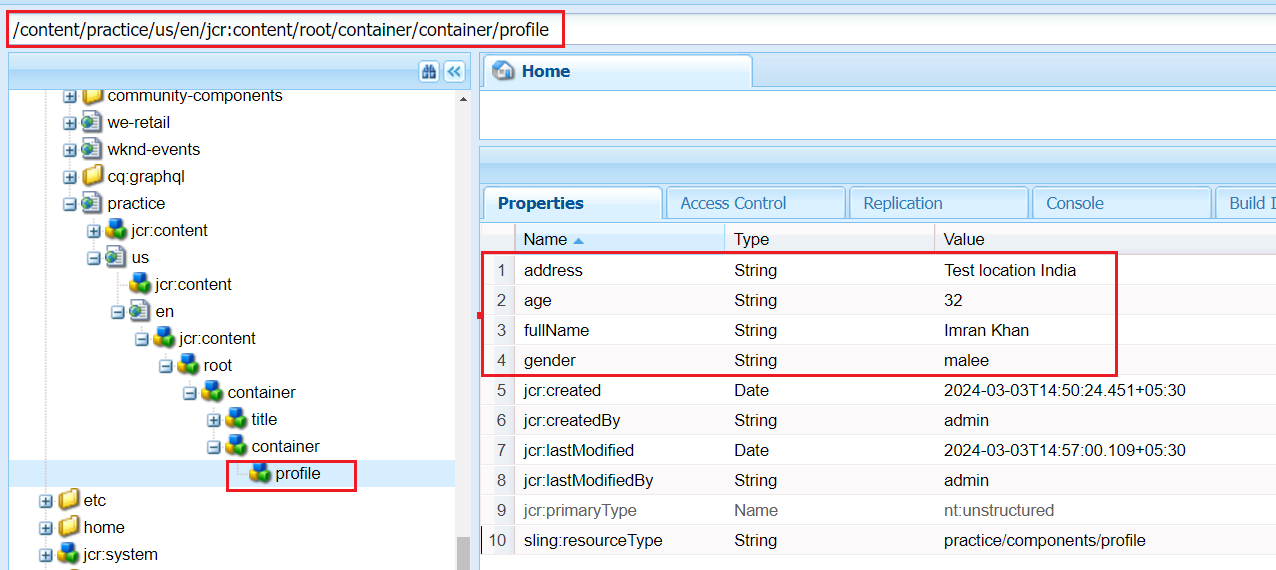
14. Below is the over all node hierarchy where we can see our profile component got dragged and dropped as part of en page.
Follow link to consume Sling Model to render component properties and writing business logic to follow best practices.

Imran Khan, Adobe Community Advisor, certified AEM developer and Java Geek, is an experienced AEM developer with over 12 years of expertise in designing and implementing robust web applications. He leverages Adobe Experience Manager, Analytics, and Target to create dynamic digital experiences. Imran possesses extensive expertise in J2EE, Sightly, Struts 2.0, Spring, Hibernate, JPA, React, HTML, jQuery, and JavaScript.
