Session Management
This Spring boot tutorial will help us to load JSP file as a view after hitting controller path and manage session through out the pages.
e.g. Hitting http://localhost:8080/login url will load form.jsp in response.
Below is the Spring Boot and JPA project code structure which we are going to build as part of this article. We will be making changes inside highlighted package and files.

As part of this article we will be using Spring tool kit and to download and setup Spring Tool Kit please click on this link.
Follow below steps to create our very first Spring application project.
- Open Spring Tool kit we installed here.
- Click on File in top navigation menu and than click on new. There will be an option Spring Starter Project start appearing once we click on create new option.
Below window will start appearing.
Provide below highlighted value for Group and Artifact for the project and click on Next.

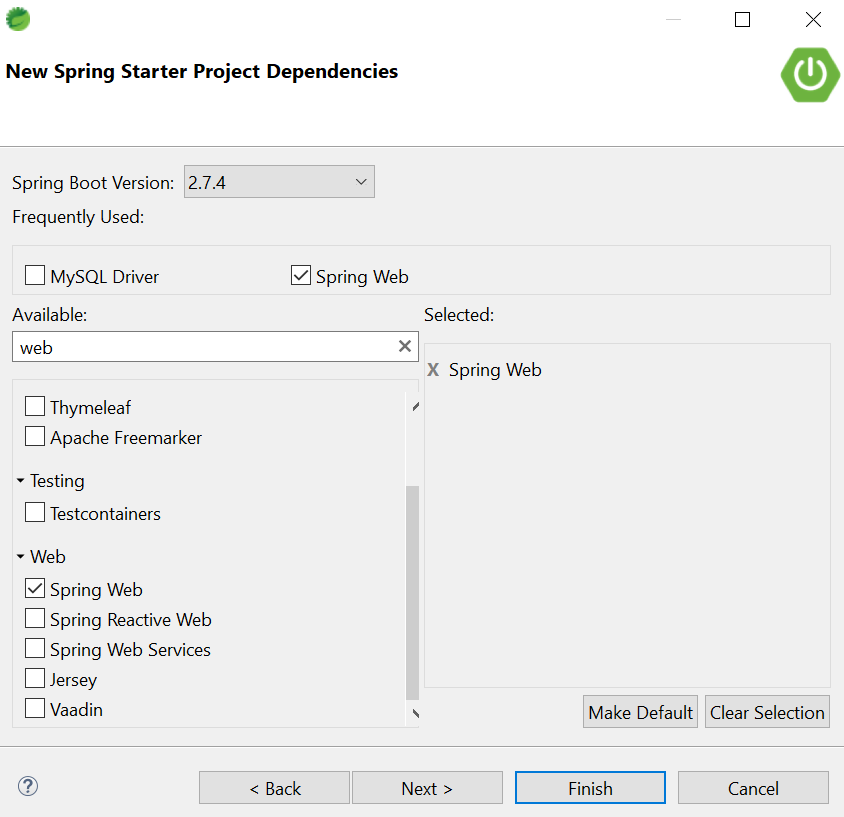
3. In the below screen select open Web option and select Spring Web. Click on Finish will create Spring project.

4. Add below dependencies are required to work with Form, JPA and MySQL

tomcat-embed-jasper dependency is require to load jsp as part of controller response.
5. Create UserController.java class as mentioned in below screenshot tp handle http://localhost:8080/login request.

@PostMapping annotation to handle POST request.
@GetMapping annotation to handle GET request.
@SessionAttributes(“name”) annotation will help to store value in session and access it on other pages and controllers.
6. Create ProfileController.java class as mentioned in below screenshot to handle http://localhost:8080/profile request.

Note: It is important to write @SessionAttributes(“name”) in all controller classes to maintain session
7. Create below hierarchy to place jsp files inside src/main/resources folder as shown below.

8. Create form.jsp file and place below content inside the same file.

9. Create welcome.jsp file and place below content inside the same file.

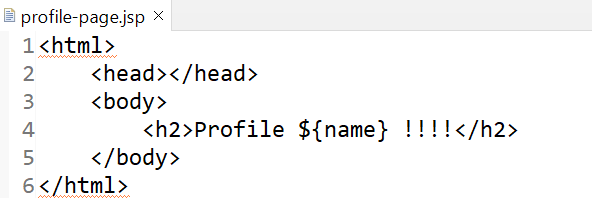
10. Create profile-page.jsp file and place below content inside the same file.

Note: Both welcome.jsp and profile-page.jsp page will read name variable value from session.
11. Below code inside application.properties file is required to inform spring framework to locate view files and its extension.

Note: Complete path is not required to give as prefix /src/main/resources/META-INF/resources/WEB-INF/jsp/form.jsp
Spring understands /src/main/resources/META-INF/resources as a default path.
12. Right click on the project and run it as Spring Boot App. Hit http://localhost:8080/login url with specified port number in console once server is up.

Note: According to below code snippet written in UserController.java. It will load welcome.jsp if name and password gets match. It will load login page back if name and password didn’t get match.

Fill name and password as admin. Click on submit will load below welcome page:


Click on above profile link will take us to profile.jsp page and show user name value from session.

On multiple refresh of below page below not loose above user name value as admin.

Imran Khan, Adobe Community Advisor, certified AEM developer and Java Geek, is an experienced AEM developer with over 12 years of expertise in designing and implementing robust web applications. He leverages Adobe Experience Manager, Analytics, and Target to create dynamic digital experiences. Imran possesses extensive expertise in J2EE, Sightly, Struts 2.0, Spring, Hibernate, JPA, React, HTML, jQuery, and JavaScript.
