RESTful Web Service
This blog will help to understand main Spring boot RESTFul web services. There will be a detailed discussion over various mappings to load data.
This article will help to learn, revise and prepare for interview on how Spring Boot RESTFul web service actually works step by Step to get and post data to server.
Below is the Spring Boot and JPA project code structure which we are going to build as part of this article. We will be making changes inside highlighted package and files.

As part of this article we will be using Spring tool kit and to download and setup Spring Tool Kit please click on this link.
Follow below steps to create our very first Spring application project.
- Open Spring Tool kit we installed here.
- Click on File in top navigation menu and than click on new. There will be an option Spring Starter Project start appearing once we click on create new option.
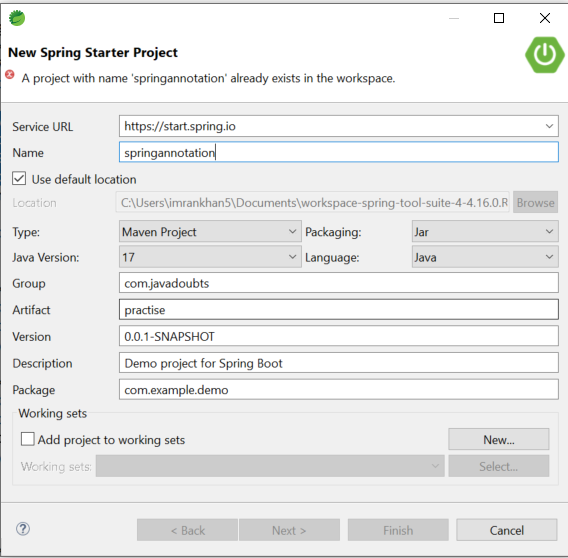
Below window will start appearing.
Provide below highlighted value for Group and Artifact for the project and click on Next.

3. In the below screen select open Web option and select Spring Web. Click on Finish will create Spring project.

4. Create User.java class as mentioned in below screenshot with id and name variable with setter getter and constructors.

5. Create one more UserController.java class with below content
Read comment also while studying code will help to understand better.

6. Below class by default get created when we create project using STS or initializr.

7. Select root project folder, right click and select Ran As -> Spring Boot App will start the server.
OUTPUT
Initialize Users List
http://localhost:8080/initializeUsers

Get all Users List
Hitting below URL will return all list of users with below inline output
http://localhost:8080/users

Get User by Id
Hitting below URL will return specific user having id passed as 1
http://localhost:8080/user/1

Create User by Id
For POST or to add data in List, we are going to use postman which is chrome plugin. Provide all the inputs highlighted red in color. Click on send will add user in List and return response highlighted in green.
It will call below method from UserController.java class:
@PostMapping(path = “/user”, consumes = “application/json”)
public ResponseEntity<List<User>> saveUser(@RequestBody User user) {

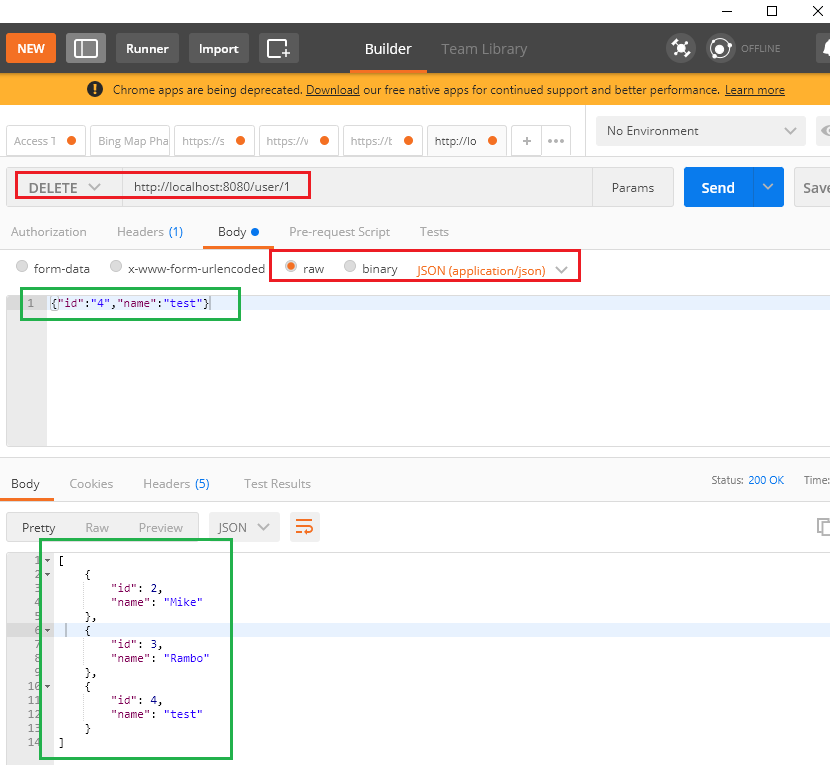
Delete User by Id
To delete user record from List, we are going to use postman which is chrome plugin. Provide all the inputs highlighted red in color. Click on send will delete user of specific Id form the List and return response highlighted in green.
Delete will call below method from UserController.java class, pick user id as 1from URL and return rest of the list of users as shown below:


Imran Khan, Adobe Community Advisor, certified AEM developer and Java Geek, is an experienced AEM developer with over 12 years of expertise in designing and implementing robust web applications. He leverages Adobe Experience Manager, Analytics, and Target to create dynamic digital experiences. Imran possesses extensive expertise in J2EE, Sightly, Struts 2.0, Spring, Hibernate, JPA, React, HTML, jQuery, and JavaScript.
