Form Validation
As part of this blog we will checking Spring Form validation framework.
There are fours major steps are require to implement Spring validation framework.
- Add below maven dependency in pom.xml for Spring validation framework to work.

2. Include below Spring framework form tab library inside jsp file:
<%@ taglib prefix=”form” uri=”http://www.springframework.org/tags/form” %>
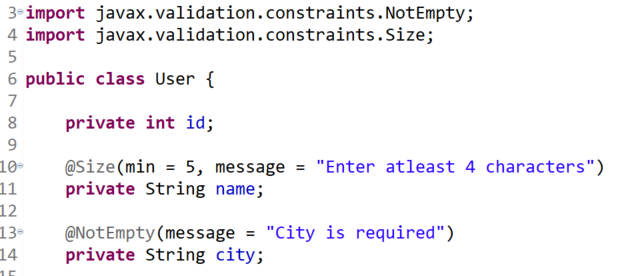
3. Annotate bean class with proper required validation as shown below

@Size to validation min or max String length.
@NotEmpty annotation will check for empty String
4. Add @Valid annotation to validate user input.

End to End Implementation
Below is the Spring Boot application project code structure which we are going to build as part of this article. We will be making changes inside highlighted package and files.

As part of this article we will be using Spring tool kit and to download and setup Spring Tool Kit please click on this link.
Follow below steps to create our very first Spring application project.
- Open Spring Tool kit we installed here.
- Click on File in top navigation menu and than click on new. There will be an option Spring Starter Project start appearing once we click on create new option.
Below window will start appearing.
Provide below highlighted value for Group and Artifact for the project and click on Next.

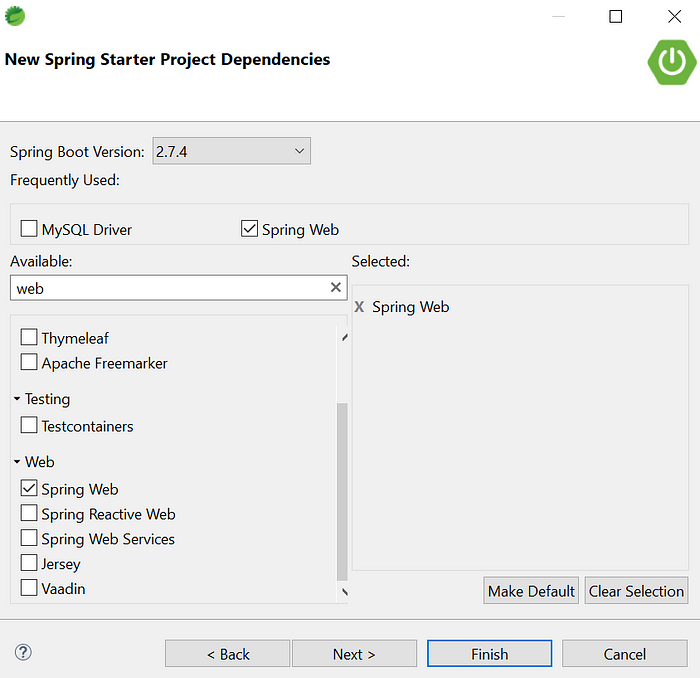
3. In the below screen select open Web option and select Spring Web. Click on Finish will create Spring project.

4. Add below dependencies are required to work with Form, JPA and MySQL

spring-boot-starter-validation dependency is require to perform all the validations.
5. Create below User.java bean class and mention below highlighted validations for name and city field.

6. Create UserController.java class as mentioned in below screenshot to handle http://localhost:8080/user-detail request.

@PostMapping annotation to handle POST request.
@GetMapping annotation to handle GET request.
@Valid annotation will help us to validation submit form values with bean in controller. If validation fails, code will not enter inside mapped function.
7. Below code inside application.properties file is required to inform spring framework to locate view files and its extension.

Note: Complete path is not required to give as prefix /src/main/resources/META-INF/resources/WEB-INF/jsp/form.jsp
Spring understands /src/main/resources/META-INF/resources as a default path.
8. Create below form.jsp file to enter name and city with submit buttons.

modelAttribute=”user” is must to have below line in controller to initialize User on page load else it will throw an exception.

Below is the mapping to create User.java bean:

9. Create welcome.jsp file to show entered value.

10. Please enter below URL to load page, enter name and city. According to User.java bean class validation, city is required and name String length must is greater than 5 else it will throw error as shown below.
OUTPUT
http://localhost:8080/user-detail

Click on submit will give below error:

Again, Click on submit after entering name length greater than 5 and city will redirect to welcome page.


Imran Khan, Adobe Community Advisor, certified AEM developer and Java Geek, is an experienced AEM developer with over 12 years of expertise in designing and implementing robust web applications. He leverages Adobe Experience Manager, Analytics, and Target to create dynamic digital experiences. Imran possesses extensive expertise in J2EE, Sightly, Struts 2.0, Spring, Hibernate, JPA, React, HTML, jQuery, and JavaScript.
