Spring Boot Security
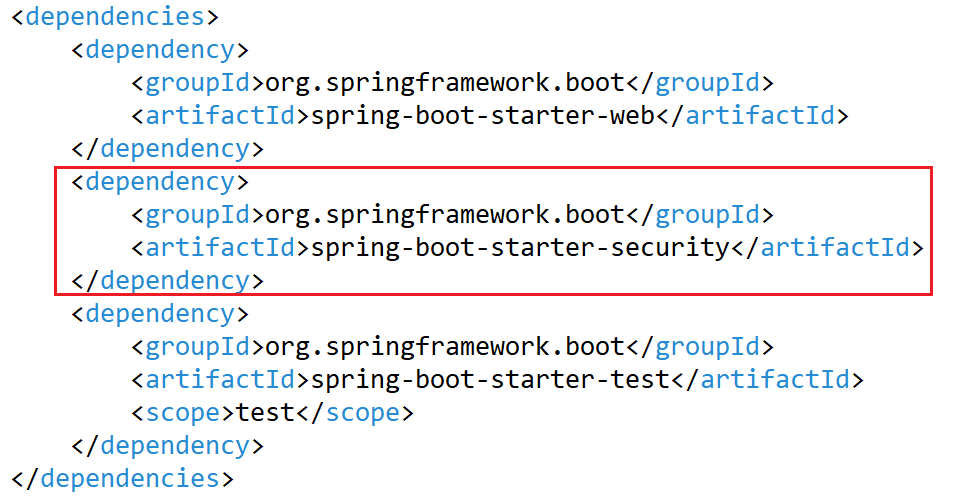
Adding below Spring boot security dependency as spring-boot-starter-validation in pom.xml file, application will automatically start showing login authentication screen for all endpoint URL’s.

Example
Below is the Spring Boot application project code structure which we are going to build as part of this article. We will be making changes inside highlighted package and files.

As part of this article we will be using Spring tool kit and to download and setup Spring Tool Kit please click on this link.
Follow below steps to create our very first Spring application project.
- Open Spring Tool kit we installed here.
- Click on File in top navigation menu and than click on new. There will be an option Spring Starter Project start appearing once we click on create new option.
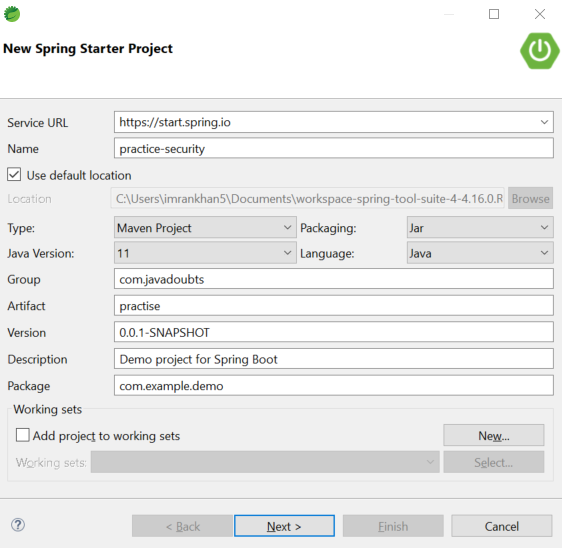
Below window will start appearing.
Provide below highlighted value for Group and Artifact for the project and click on Next.

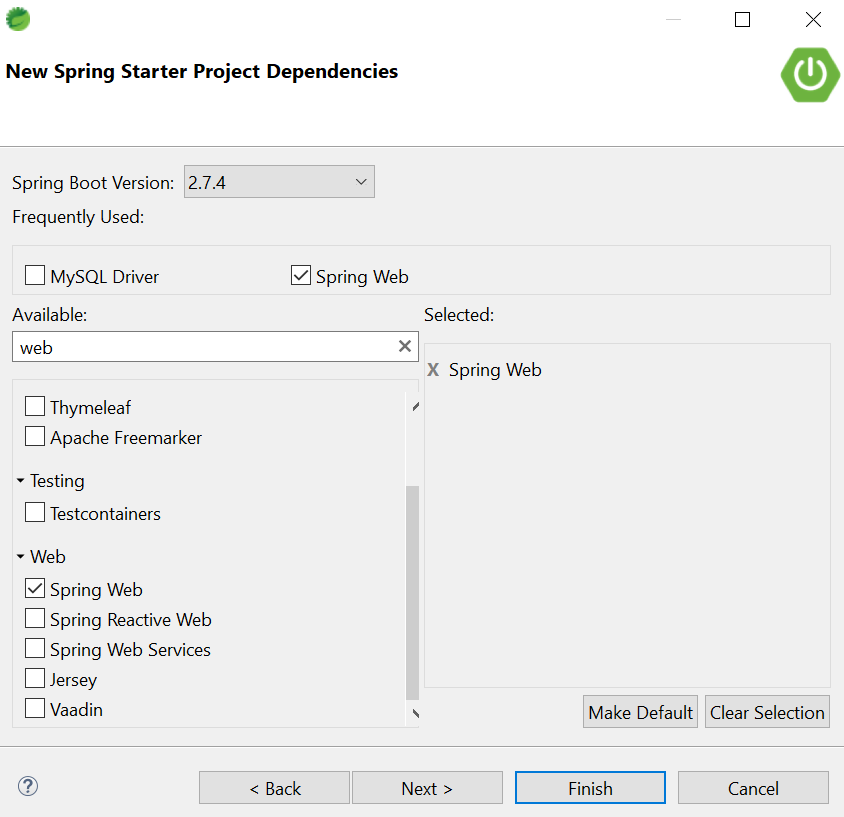
3. In the below screen select open Web option and select Spring Web. Click on Finish will create Spring project.

4. Create UserController.java class as mentioned in below screenshot to handle localhost:8080/users request.

@RequestMapping annotation is used to define header, uri, method type, parameters, path, consume type, etc.
@ResponseBody annotation is to return response body as an Object or String.
5. Hit localhost:8080/users URL will shown below output.

6. Now, lets include below Spring security dependency in pom.xml to make all our URL secure. Let’s wait for 2 to 3 minutes after saving below changes in pom.xml to include required dependency in project.
Stop and start the server again in require as we made changes in pom.xml file.

7. Again, hit localhost:8080/users URL and it will redirect us to login page as we have added security dependency in earlier 8th step.

8. By default username will be user and password can be found out in eclipse console once server started as highlighted below. This password is dynamic and will be different every time we start server.

9. It will require below code change to make password consistent every time we start server.
As part of below code we kept both username and password as admin.

10. Once again, hit localhost:8080/users URL and login with username and password as admin will open subsequent screen.


Imran Khan, Adobe Community Advisor, AEM certified developer and Java Geek, is an experienced AEM developer with over 11 years of expertise in designing and implementing robust web applications. He leverages Adobe Experience Manager, Analytics, and Target to create dynamic digital experiences. Imran possesses extensive expertise in J2EE, Sightly, Struts 2.0, Spring, Hibernate, JPA, React, HTML, jQuery, and JavaScript.
